Original article is posted here.
For every project I develop, there’s a high probability that a custom-made SQL database is going to be useful to the process I’m working on. I’m going to detail my process here, which should be a good follow-up to my SQL primer here.
Note that while this is not intended to be a tutorial on how to use SQL, I will be covering the SQL basics needed to complete this demo. Send me a note if you have any issues with any of the steps.
For this project, we’re going to build an integration library with two components. One component is going to be a simple data query component that we’ll use to validate a proposed data write before committing; the second will be the Stored Procedure caller that will handle updates, inserts, and deletes. The same component can also be used for other, more specific tasks, such as order changes and re-sorting. Let’s start with the second component – the Stored Procedure caller.
Building a Demo SQL Database
First, let’s build a custom demo database (or skip to the next section on Creating a Stored Procedure).
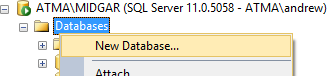
I’ve named my database [StoredProcedureCallDemo].
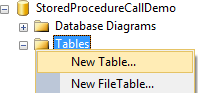
Now, let’s create a table. I’m going to call it [DemoTable].
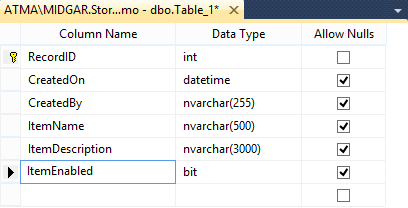
Give it some columns:
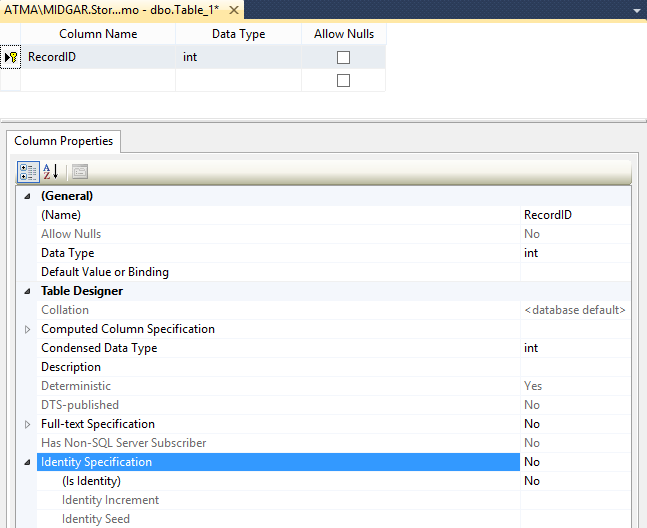
Set [RecordID] (or whatever you name the identity column) as PrimaryKey for the table.

Let’s set the [RecordID] column so that it automatically increments for us as well. Set Identity = True.

Name the table (press F4 in SSMS if the panel isn’t visible already) and save (Ctrl + S).

Now we have a table to use for our demo. Moving on!
Building a Stored Procedure
Now let’s have a look at the Stored Procedure, and how it’s going to accomplish the actions we need. Note that in SSMS, you can force a refresh of Intellisense by pressing “Ctrl + Shift + R“. It’ll make things easier if you like autocomplete.
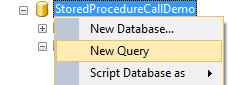
Open a new query window in the new database context. Right-click the database and click “New Query” (alternately you can expand “Programmability” and right-click “Stored Procedures” and create a new one there).
Here is the SQL I’m using to create the stored procedure for this demo:
USE [StoredProcedureCallDemo]
GO
SET ANSI_NULLS ON
GO
SET QUOTED_IDENTIFIER ON
GO
CREATE PROCEDURE [dbo].[SP_AdjustDemoTable]
@RecordID int
,@CreatedOn datetime
,@CreatedBy nvarchar(255)
,@ItemName nvarchar(500)
,@ItemDescription nvarchar(3000)
,@ItemEnabled bit
,@AdjustmentType nvarchar(6)
AS
BEGIN
SET NOCOUNT ON;
if (@AdjustmentType != 'update'
and @AdjustmentType != 'insert'
and @AdjustmentType != 'delete')
begin
SET NOCOUNT ON --invalid input
end
else
/* Update Record */
if @AdjustmentType = 'update'
begin
update [DemoTable]
set [ItemName] = LTRIM(RTRIM(@ItemName))
,[ItemDescription] = LTRIM(RTRIM(@ItemDescription))
,[ItemEnabled] = @ItemEnabled
where [RecordID] = @RecordID
end
/* Insert Record */
if @AdjustmentType = 'insert'
begin
insert into [DemoTable]
([CreatedOn]
,[CreatedBy]
,[ItemName]
,[ItemDescription]
,[ItemEnabled])
values (getDate()
,LTRIM(RTRIM(@CreatedBy))
,LTRIM(RTRIM(@ItemName))
,LTRIM(RTRIM(@ItemDescription))
,1)
end
/* Delete Record */
if @AdjustmentType = 'delete'
begin
delete from [DemoTable]
where [RecordID] = @RecordID
end
END
GO
Press F5 to run the script and create the stored procedure.
Verify that the object was created in the proper place:
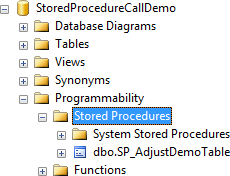
If you don’t see it, click the “Stored Procedures” folder and press F5 to refresh.
We’re ready to integrate the stored procedure; let’s create a quick supplementary validation query to include in our integration library.
Validation Query
The validation query is intended to check for the existence of a value in a database table prior to updating or inserting what could be a duplicate or otherwise conflicting value.
Let’s write this script so we can move on to the integration library.
select [RecordID]
,[CreatedOn]
,[CreatedBy]
,[ItemName]
,[ItemDescription]
,[ItemEnabled]
from [DemoTable]
where 1 = 1
@_querystring
order by [ItemName]
Keep this script handy; we’ll use it shortly. Also – ignore the SSMS error for the false declaration (@_querystring); that’s going to be used by the Workflow integration wizard when we copy/paste this script in.
Creating a Demo SQL Integration Library
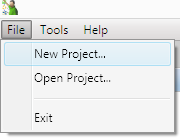
Now that our SQL database is configured the way we need (this article assumes that you have properly configured security on your SQL server instance (tip: run the Symantec Workflow service as a service account, and give SQL db sysadmin rights to the same account)), it’s time to create an integration library. In Workflow Manager, click “File” and “New Project”.
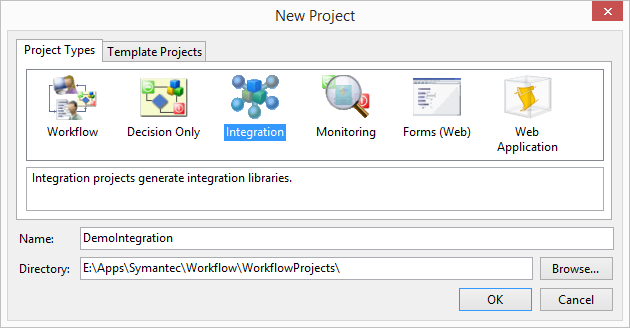
Select “Integration” and give the library a name.
Building the Validation Query Component
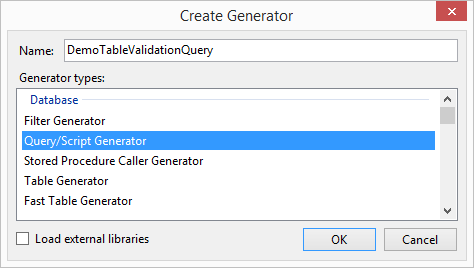
Let’s handle the validation query first. In the window that pops up, give our validation query a name, and select the “Query/Script Generator” type:
Note that for some versions of Workflow, the application window at this step may not have a taskbar icon. If you’ve lost the window, start minimizing windows until you find it again.
Click OK, and configure your SQL information and paste in the validation query we wrote in the previous section.
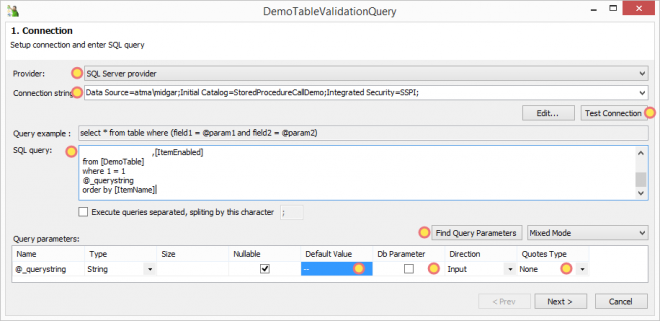
Points of interest have been marked in this illustration. Ensure that, for the purpose of this demo, all values match the above representation. This excludes of course the Connection String value, which should be adjusted to match your environment. Click to enlarge.
After this step is configured, continue on. For the sake of the demo, let’s just leave “Populate into component” selected for step 2. Click “Next” again.
Click “Next” again on step 3.
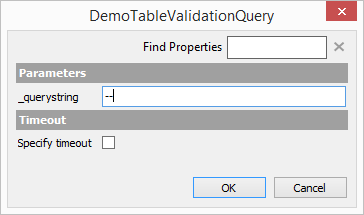
On step 4, click “Returns data” and the wizard will immediately attempt to run the script and fetch the appropriate data using the connection string and query configured in step 1. In the popup window, we’re asked for a value for the input parameter we defined in step 1. We set the default value for that parameter as a “comment mark” (–), but at runtime the value will be more specific. Leave the default value and click OK to run the query.
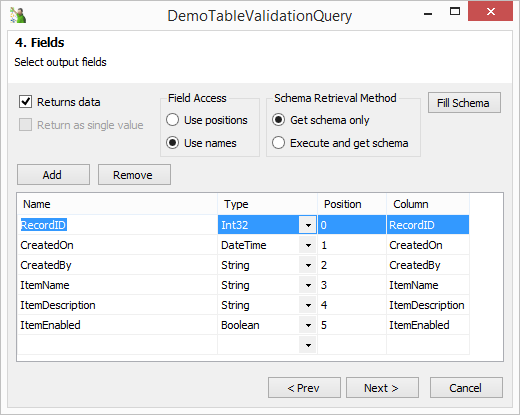
The query results should build the table schema and look like this:
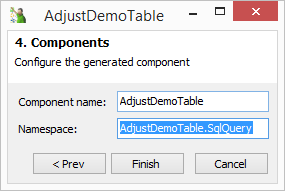
Click “Next” to name the component and complete this step.

Complete the “Component name:” field and press Tab to automatically fill in the remaining 2 fields.
Click Finish to stage this component to the compiler. Don’t click “OK” yet; we aren’t quite finished here.
Building the Stored Procedure Component
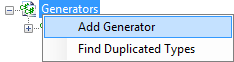
Now for the easy part. Right-click on “Generators” and “Add Generator”.
Give the generator a name and type:

For step 1 of the wizard, supply the values as follows, swapping in your connection string:
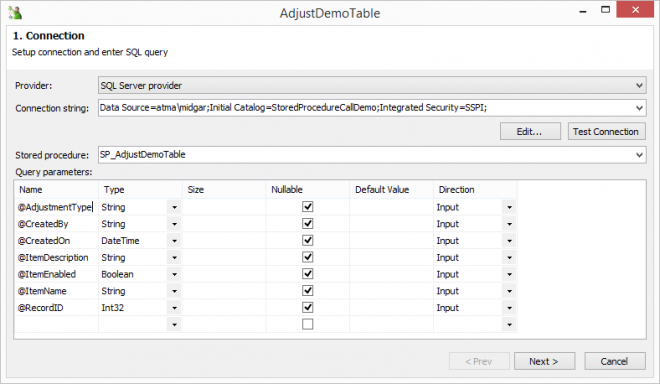
Note that the “Stored procedure” dropdown list will be populated by whatever stored procedures exist at the location indicated by the connection string provided.
Click “Next”, and leave the defaults for steps 2 and 3. For the sake of the demo, we’re not returning any data from the stored procedure; although sometimes it’s required if we’re creating a new record and need the new ID to be returned for use in a project.
Name the component, press Tab, and click Finish. We’re ready to compile the library.
Compiling, Categorization, and Component Information
Click “OK” to finish up in the “Generators Management” window.
Click “Compile and Close” to wrap things up.
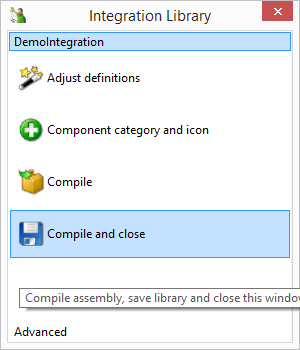
At this point, everything should work fine. We can add icons, component details, categorize the components, and etc in this window, but again, for the demo’s sake, I’m going to save and close as-is.
The library is now ready to add to a project.
Stored Procedure Proof-of-Concept
The easiest way to supply all the small details of a demo forms project without duplicating previous article content is to just add a demo project for download.
Here are some high-level details, though.
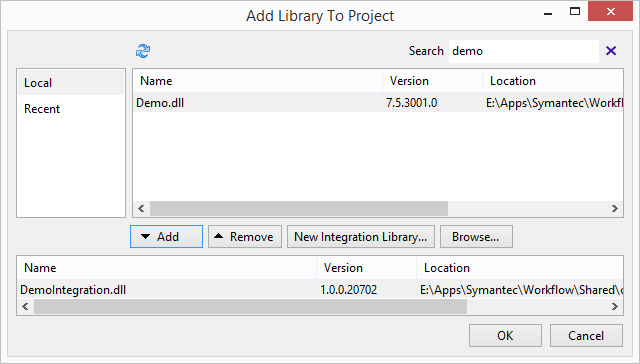
Click “Import Components” to add the new library.

Select the library and click “Add”, then “OK”. The components container should load into your toolbox.
Configuration Tips – Stored Procedure Caller Component
The stored procedure component will be used to update, insert, or delete a row. The difference being the “AdjustmentType” input parameter that we created for the component. For example, here is the component in the demo that will update the table:

Recall from the stored procedure script the values that are actually required. For example, for an insert action:
--code snippet from SP

if @AdjustmentType = 'insert'
begin
insert into [DemoTable]
([CreatedOn]
,[CreatedBy]
,[ItemName]
,[ItemDescription]
,[ItemEnabled])
values (getDate()
,LTRIM(RTRIM(@CreatedBy))
,LTRIM(RTRIM(@ItemName))
,LTRIM(RTRIM(@ItemDescription))
,1)
end
SQL is handling [CreatedOn] and [ItemEnabled] for us, so the inputs for these fields for an “insert” component are arbitrary. Also notice that for an insert, we don’t care about [RecordID], as it’s being incremented automatically by SQL as an identity column.
For the “delete” component, the only value that needs to be a real value is the [RecordID] value. Have a look at the SQL snippet from the delete section:
if @AdjustmentType = 'delete'
begin
delete from [DemoTable]
where [RecordID] = @RecordID
end
This is all to say that while we don’t need real values in the extra fields where they aren’t required, the component does require some value. So for the “CreatedOn” input parameter, for example, just select the default date for the component’s field.
Configuration Tips – Validation Query Component
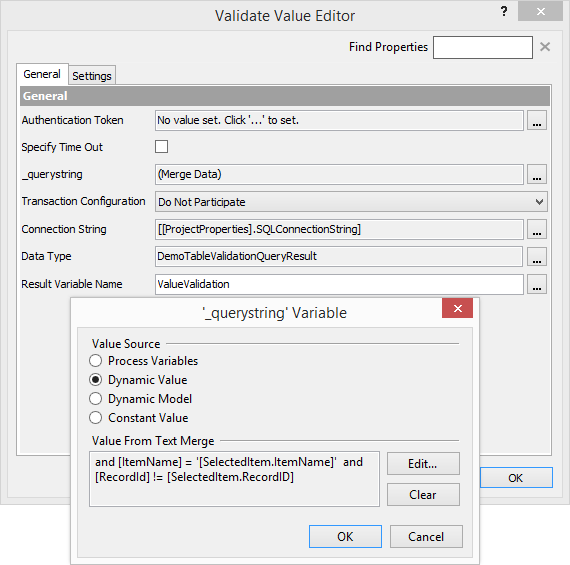
Lots of info can be found here on the concept used for the input parameter for this component. Basically, this component is being used to search for any pre-existing data that matches what the user is attempting to write to the table.
Here’s a screenshot of the “update” component. We’re running a query to find out if any record exists that has the same [ItemName] with a [RecordID] different than the selected record. This ensures that the user won’t update an existing record to match another existing record by name.
Well – this post has gotten rather bloated, so I’m going to call it a day. Have a look at the attached demo packages. If you’re unable to follow it or need some clarification, send me a note and I’m happy to help.
The finished, published product is attached as a gif.
Further Reading
Concepts Primer – Integrating SQL Data with Symantec Workflow
Workflow and SQL – Parameterizing Conditions