1. Summary
1.1 This document is the next in the series of my experience with the Symantec Management Platform project. Specifically, this document is part two of two for the Mobile Device Management solution from Symantec.
1.2 This document details the steps I took to configure the profile encryption and security for the MDM solution in my environment. These steps worked flawlessly (after much trial and error) for me, but should be reviewed with your architect first to ensure they will work for your environment. Most steps will need to be modified based on your requirements for your environment, so please keep that in mind when reading through this article.
1.3 The first part of this series may be found here https://www-secure.symantec.com/connect/articles/how-install-and-configure-mobile-device-management-part-1-2
2.1 Login to the SMP.
2.2 Click Home | Mobile Management.
2.3 Expand Settings in the left column.
2.4 Click iOS Enrollment.
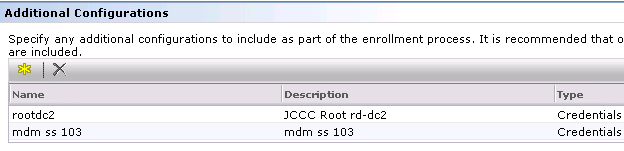
2.5 In the lower pane under Additional Configurations, click the yellow star and add the SMM SS SSL Cert you created earlier AND add the Root CA Credential you added earlier.
Note: If you are planning to secure the issuing and signing and encryption of data using profiles (which JCCC is doing) then you will need to closely follow the rest of the document. Most of the following information was obtained from https://www-secure.symantec.com/connect/articles/ios-profile-security-how-sign-and-encrypt-ios-configuration-profiles
NOTE: We had to make a permission changes on the CA and the template to allow my account to be able to request the web certs for the account that I logged into the SMM SS with when performing these steps.
3.1 On the SMM SS, from IIS Manager, click on the server name in the left pane.
3.2 Double-click Server Certificate in the middle pane.

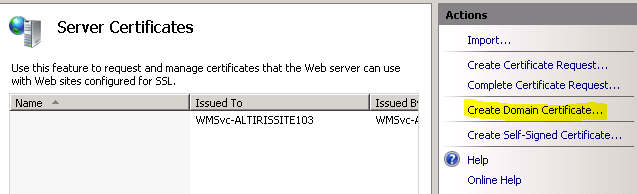
3.3 On the most right pane, click Create Domain Certificate.

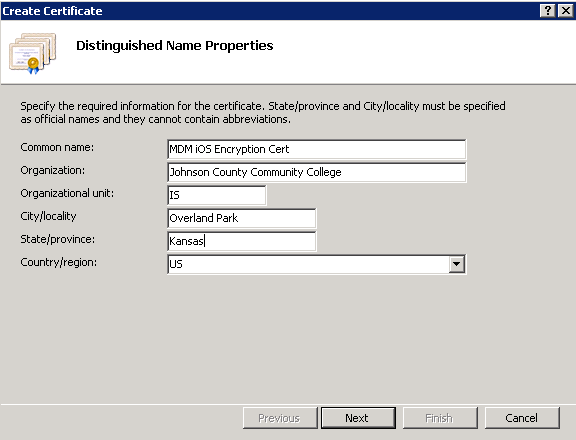
3.4 Enter the common name MDM iOS Signing Cert and fill the rest of required fields and then click Next.

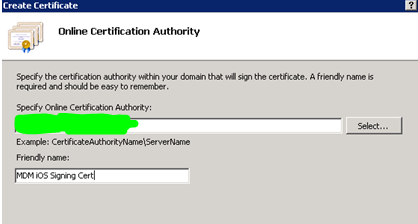
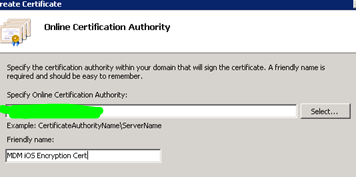
3.5 Select the CA and enter a friendly name for the certificate and then click Finish.
4.1 On the SMM SS, from IIS Manager, click on the server name in the left pane.
4.2 Double-click Server Certificate in the middle pane.

4.3 On the most right pane, click Create Domain Certificate.
4.4 Enter the common name MDM iOS Encryption Cert and fill the rest of required field and then click Next.
4.5 Select the CA and enter a friendly name for the certificate then and then click Finish.
NOTE: These next steps are confusing and most of my issues occurred here, so please read through them and try to best comprehend them before trying them.
5.1 On the SMM SS, click Start | Run.
5.2 Enter mmc and click OK.
5.3 In the MMC console, click File |Add/Remove Snap-in…
5.4 Double click Certificates.
5.5 Choose Computer account.
5.6 Click Next.
5.7 Select Local Computer.
5.8 Click Finish then click OK.
5.9 Expand Console Root | Certificates (Local Computer) | Personal | Certificates.
5.10 Double click the Apple Application Integration certificate.
5.11 Click the Details tab.
5.12 Click Copy to File button.
5.13 Click Next.
5.14 Choose DER encoded binary x.509.
5.15 Click Next.
5.16 Browse and enter a file name to save as.
Ex. C:\cert\Site103AppleCACert.cer
5.17 Click Next, Finish, and then click OK.

6.1 On the SMM SS, open MMC certificates console.
6.2 Under Personal |Certificates, double-click on the signing certificate.
6.3 Click the Details tab.
6.4 Click Copy to File.
6.5 In the Certificate Export Wizard, click Next.
6.6 Choose No, do not export the private key.
6.7 Choose DER encoded binary x.509.
6.8 Click Next.
6.9 Browse and enter a file name to save as.
Ex. C:\cert\Site103sign.cer.
6.10 Click Next, Finish, and then OK.
7.1 On the SMM SS, open MMC certificates console
7.2 Under Personal |Certificates, double-click on the encryption certificate.
7.3 Click the Details tab.
7.4 Click Copy to File.
7.5 In the Certificate Export Wizard, click Next.
7.6 Choose No, do not export the private key.
7.7 Choose DER encoded binary x.509.
7.8 Click Next.
7.9 Browse and enter a file name to save as.
Ex. C:\cert\Site103Encrypt.cer
7.10 Click Next, Finish, and then OK.
8.1 On the SMM SS, click Start | Run.
8.2 Enter mmc and click OK.
8.3 In the MMC console, click File |Add/Remove Snap-in…
8.4 Double click Certificates.
8.5 Choose Computer account.
8.6 Click Next.
8.7 Select Local Computer.
8.8 Click Finish then click OK.
8.9 Expand Console Root | Certificates (Local Computer) | Personal | Certificates.
8.10 Double-click the Signing certificate.
8.11 Click the Details tab.
8.12 Click Copy to File.
8.13 In the Certificate Export Wizard, click Next.
8.14 Choose Yes, export the private key.
8.15 Click Next.
8.16 On the next screen, leave the defaults and then click Next.
8.17 Click Next.
8.18 On the next screen, enter the svc-alt password. (xxxxxxx) and then click Next.
8.19 Click Next.
8.20 Browse and enter a file name to save as.
Ex. C:\cert\Site103Sign.pfx.
8.21 Click Next, Finish, and then OK.
9.1 On the SMM SS, click Start | Run.
9.2 Enter mmc and click OK.
9.3 In the MMC console, click File |Add/Remove Snap-in…
9.4 Double click Certificates.
9.5 Choose Computer account.
9.6 Click Next.
9.7 Select Local Computer.
9.8 Click Finish then click OK.
9.9 Expand Console Root | Certificates (Local Computer) | Personal | Certificates.
9.10 Double-click on the Encryption certificate you generated above.
9.11 Click the Details tab.
9.12 Click Copy to File.
9.13 In the Certificate Export Wizard, click Next.
9.14 Choose to Yes, export Private Key.
9.15 Click Next.
9.16 On the next screen, leave the defaults and then click Next.
9.17 Click Next.
9.18 On the next screen, enter the svc-alt password. (xxxx) and then click Next.
9.19 Click Next.
9.20 Browse and enter a file name to save as.
Ex. C:\cert\Site103Encrypt.pfx
9.21 Click Next, Finish, and then click OK.
Note: For this step, iIt is easiest if they are copied from the SS in the steps above where they were created over to the SMP to import.
10.1 On the SMP, click Start | Run.
10.2 Enter mmc and click OK.
10.3 In the MMC console, click File |Add/Remove Snap-in…
10.4 Double click Certificates.
10.5 Choose Computer account.
10.6 Click Next.
10.7 Select Local Computer.
10.8 Click Finish then click OK.
10.9 Expand Console Root | Certificates (Local Computer) | Personal.
10.10 Right-click on Certificates and select All tasks | Import
10.11 Browse to, and import the 2 Certificates Site103Encrypt.cer and Site103Sign.pfx. You need to enter the password set previously for importing Site103Sign.pfx. (leave all defaults when importing).
10.12 Ensure those certificates appear in the Personal certificate store.
11.1 On the SMP, click Start | Run.
11.2 Enter mmc and click OK.
11.3 In the MMC console, click File |Add/Remove Snap-in…
11.4 Double click Certificates.
11.5 Choose Computer account.
11.6 Click Next.
11.7 Select Local Computer.
11.8 Click Finish then click OK.
11.9 Expand Console Root | Certificates (Local Computer) | Personal | Certificates.
11.10 Double click the Signing certificate you just imported.
11.11 Click the Details tab.
11.12 Scroll down to the thumbprint.
11.13 Copy the Thumbprint out to a text document and save for later steps. : xx xx xx xx xx xx xx xx xx xx xx xx xx xx
11.14 Double click the Encryption certificate you just imported.
11.15 Click the Details tab.
11.16 Scroll down to the thumbprint.
11.17 Copy the Thumbprint out to a text document and save for later steps.: xx xx xx xx xx xx xx xx xx xx xx xx xx xx
12.1 Open the SMP console.
12.2 Click Home | Mobile management
12.3 Click Device Management.
12.4 Click Configuration Editor.
12.5 Click Credentials, and then click the yellow star in the right pane.
12.6 Select Certificate.
12.7 Select the Site103AppleCACert.cer that was imported from the SMM SS earlier.
12.8 Type MDM Apple CA Cert for description.
12.9 Click Save Changes.
12.10 Click the yellow star in the right pane again.
12.11 Select Certificate.
12.12 Select the Site103Encrypt.pfx that was imported from the SMM SS earlier.
12.13 Type MDM Encrypt pfx for description.
12.14 Enter the password you set earlier when you exported it.
12.15 Click Save Changes.
12.16 Click the yellow star in the right pane again.
12.17 Select Certificate.
12.18 Select the Site103sign.cer that was imported from the SMM SS earlier.
12.19 Type MDM Sign Cert for description.
12.20 Click Save Changes.
13.1 In the SMP Console, click Home | Mobile Management.
13.2 In the left pane, expand Settings and click iOS Enrollment settings.
13.3 Under the Profile Security section, import the appropriate certs and enter the thumbprints.
- Profile signing certificate thumbprint: Site103Sign.cer
- Profile encryption certificate thumbprint: Site103Encrypt.cer
- Profile signing/encryption root certificate thumbprint: Site103AppleCACert.cer

Note: Here is a description of each.
Profile Signing Cert Thumbprint - The thumbprint of the certificate that is used for signing the Mobile Management server personal store that was saved in a text file above.
Profile Encryption Cert Thumbprint - The thumbprint of the certificate that is used for encryption on the Mobile Management server personal store.
Device Signing/Encryption Root Cert Config - The credential payload that contains the root certificate that is placed on devices to complete the certificate chain for the decryption and signing validation certificates.

13.4 Click Save changes.
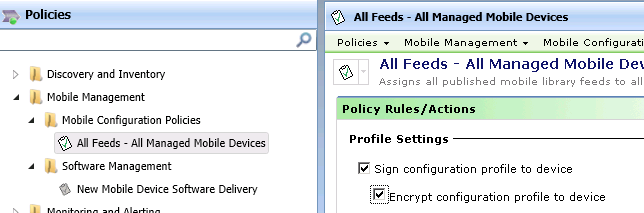
14.1 Click Manage | Policies
14.2 Expand Mobile Management | Mobile Configuration policies.
14.3 Click on All Feeds – All Managed Mobile Devices.
14.4 Checkmark Sign configuration profile to device.
14.5 Checkmark Encrypt configuration profile to device.
14.6 Click Save changes.
Additional document that helped me a lot:
http://www.symantec.com/business/support/index?page=answers&startover=y&question_box=https&product_finder=Mobile+Management&productselectorkey=58302&myclicker.x=-843&myclicker.y=-276