This article provides a method to successfully complete an installation of an application that requires a reboot in the middle of the installation process. This does not include handling reboots after an installation is complete, but when a reboot is required in the middle of the installation for the full installer to complete, this article covers that situation.
Summary
The purpose of this article is to describe how to perform installations of products that require a restart during a rollout process when there's no possibility to perform an unattended installation using Managed Delivery Policy of Software Management Solution. Some programs initiate their own restart in the middle of the installation, causing the Symantec Management Agent to lose the execution thread, which can cause the installation to error out.
As an example, this article will show how to install Microsoft SQL Server 2008 software, which requires a restart as part of the main installation process. The following items will be covered to show the full cycle of how to set this up:
- Create a Microsoft SQL Server 2008 software resource
- Change the command-line to install the software
- Create a Managed Delivery Policy based on that resource
- Add a Microsoft SQL Server 2008 software resource in the policy
- Change Advanced Options of the policy so that the policy will continue to run if a task fails
- Add a Power Control - Restart Computer task in the policy
- Add once more a Microsoft SQL Server 2008 software resource, so that the sequence of tasks will be the followed in the policy: software resource install task > restart computer task > software resource install task
Please, note that the solution described in this article does not only apply to a Microsoft SQL Server 2008 installation, but to any product that requires a restart during or in the middle of the installation process.
Creating a Microsoft SQL Server 2008 software resource
The following process is based off of the 7.0 version of Software Management, however the steps are very similar for 7.1. The difference is where you click when loading the tab pages as most of them now load into the Silverlight interface, however the same results by adjusting where you click can be achieved.
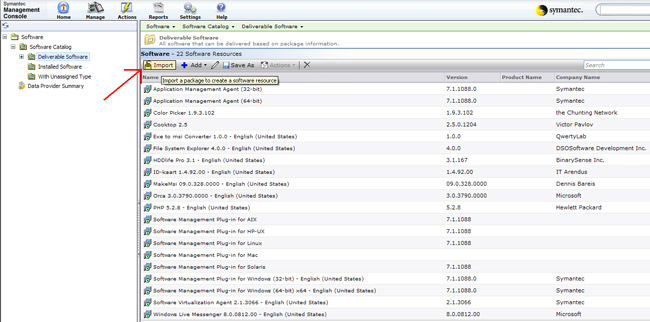
- In the Symantec Management Console, browse under Manage > Software and browse under Software > Software Catalog, and select the "Deliverable Software" view.
Silverlight: In the Symantec Management Console, browse under Manage > Software and click on the Software Releases under the Deliverable Software subheading in the far left-hand column.
- Click the Import button on the "Deliverable Software" view toolbar, as shown in the following screenshot:
Silverlight: Right-click in the Installed Software pane to the far upper left and select Import Software.
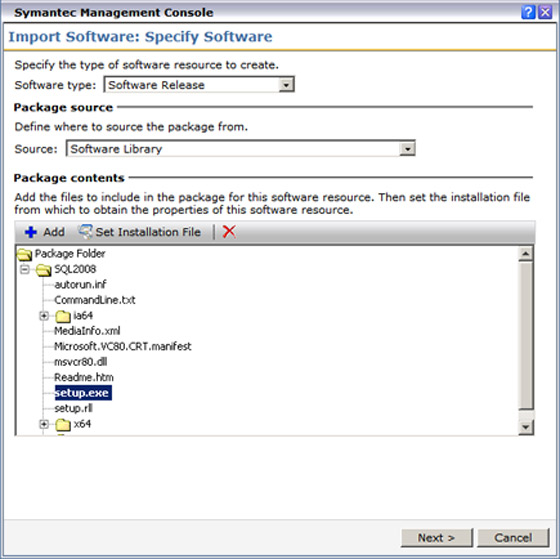
- On the first page of the resulting opened wizard, click the Add button and from the File Open dialog choose a folder containing a Microsoft SQL Server 2008 installation files. You should choose setup.exe as the installation file for this software resource (change by highlighting a file and clicking Set Installation File).
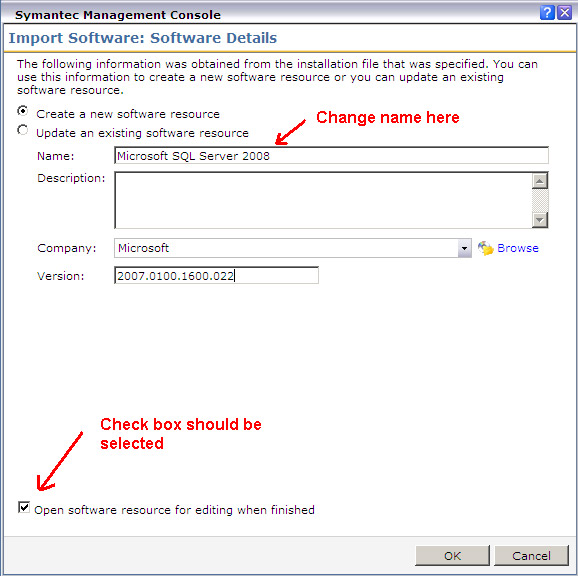
- On the next page of the wizard optionally you can change the name of the software resource to be more user-friendly. Let's name our software resource like "Microsoft SQL Server 2008". Also check box "Open software resource for editing" should be enabled as we are going to change a command-line for our resource. To finally import a software click OK button on the wizard page.
NOTE: All application files will have a hash created for them. For large installations like SQL 2008, this process may take a number of minutes to complete.
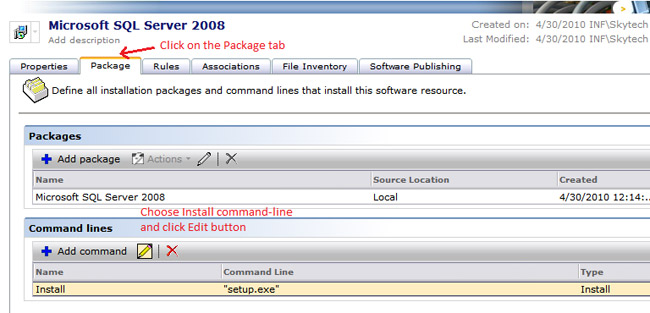
- In the opened software resource manager we need to change a command-line that will be used to install a Microsoft SQL Server 2008 software. Usually to silently install a software such SQL Server a non-default command-line should be specified. To do this, click on the Package tab, then under Command lines section choose "Install" command-line and click Edit button on the toolbar.
- In the opened "Add or Edit Command Line" web page dialog type the following command line in the Command line edit box:
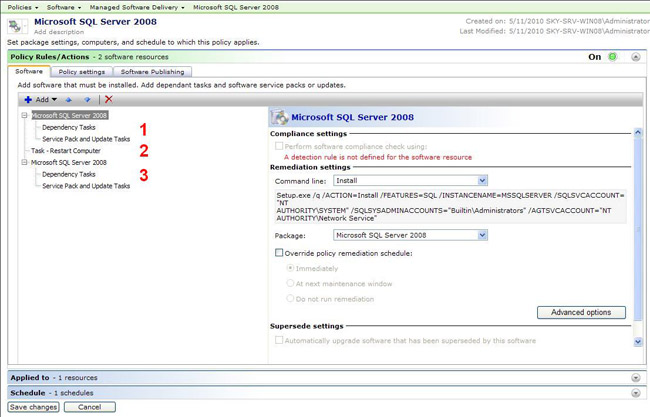
Setup.exe /qs /ACTION=Install /FEATURES=SQL /INSTANCENAME=MSSQLSERVER /SQLSVCACCOUNT="NT AUTHORITY\SYSTEM" /SQLSYSADMINACCOUNTS="Builtin\Administrators" /AGTSVCACCOUNT="NT AUTHORITY\Network Service"
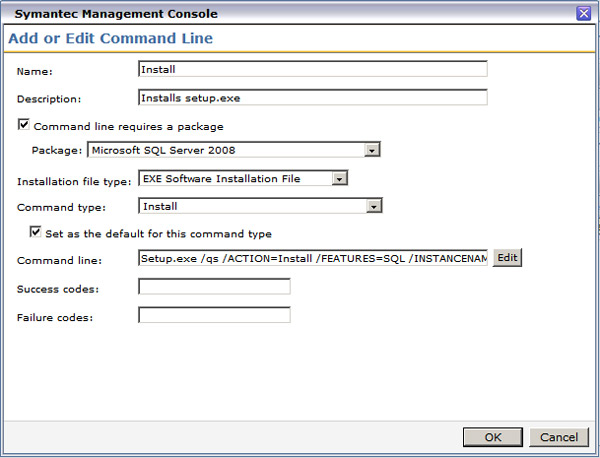
- Save changes both in the "Add or Edit Command Line" web page dialog and in the "Microsoft SQL Server 2008" software resource manager.
Creating and configuring a Managed Delivery Policy
Now that we`ve created the Software Resource to initiate the install with, now we`ll need to create the Managed Software Delivery Policy that will be used to push out this software. The Managed Delivery Policy contains all needed configuration options to complete this "Middle of the install" reboot and be able to continue after the reboot. Follow these steps to create the Software Resource. Again the screenshots are provided from 7.0, though alternative instructions contain steps for the Silverlight interface.
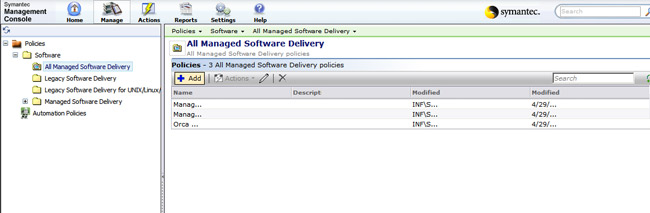
- After a "Microsoft SQL Server 2008" software resource has been created, we should create a Managed Delivery Policy based on that resource to perform the installation. To do this from Manage->Policies menu browse to the "All Managed Software Delivery" view.
Silverlight: In the Symantec Management Console, browse under Manage > Policies > and browse under Software.
- Click Add button on the "All Managed Software Delivery" view toolbar.
- Silverlight: Right-click on the Managed Software Delivery folder and choose New > Managed Software Delivery.
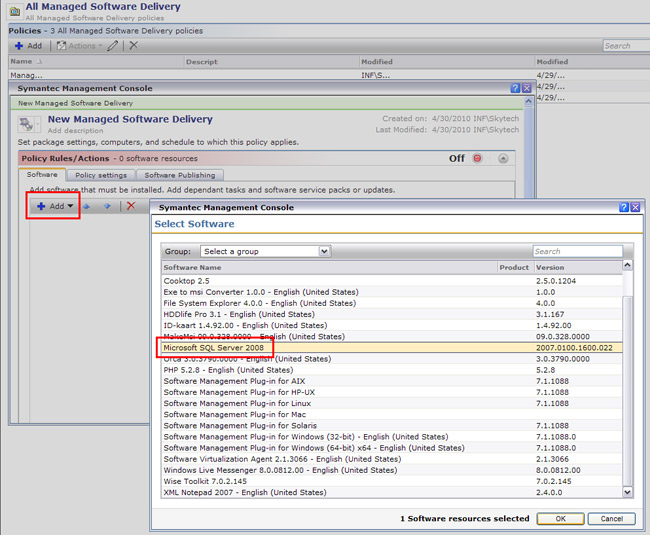
- New Managed Software Delivery window opens. In that window first of all we should add a software resource that will be installed. To do this, on the Software tab click Add button, and in the opened drop-down menu click Software Resource button. In the opened "Select Software" webpage dialog find and choose our recently created "Microsoft SQL Server 2008" software resource and click OK button.
- After a software resource has been added to a Managed Delivery Policy, select the "Microsoft SQL Server 2008" software resource and click the Advanced Options button in the right pane of the window.
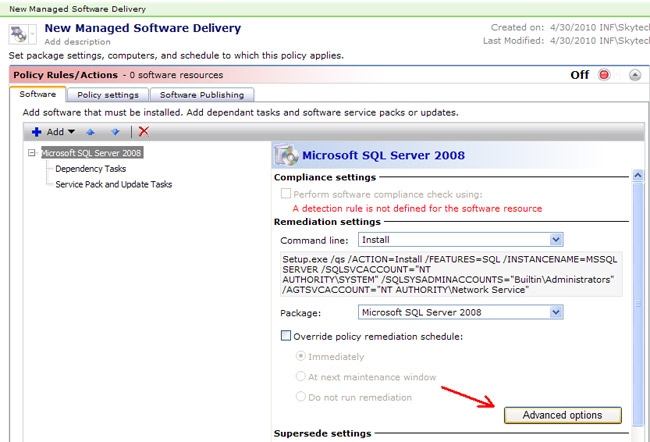
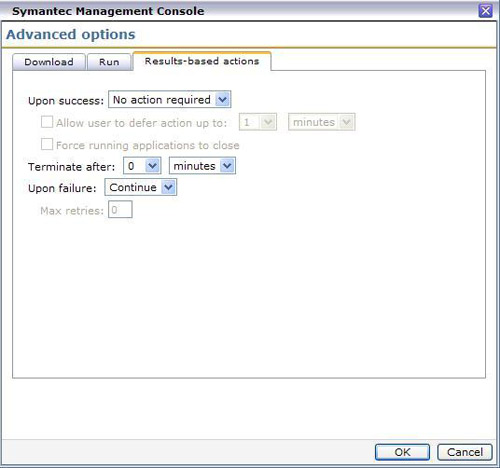
- In the Advanced Options webpage dialog click on the Results-based actions tab and set the following settings:
- Upon success: No action required
- Upon failure: Continue
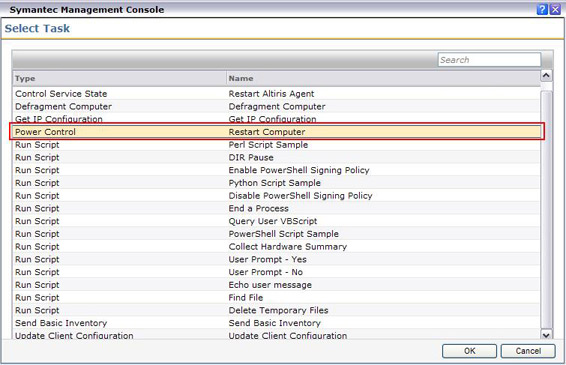
- Then in the Managed Delivery Policy on the Software tab click Add button, and in the opened drop-down menu click Task button. In the opened "Select Task" webpage dialog find and choose Power Control - Restart Computer task.
- After that in the Managed Delivery Policy once again add the "Microsoft SQL Server 2008" software resource as we have already done in step 3. But for this time don't change any of the advanced settings.
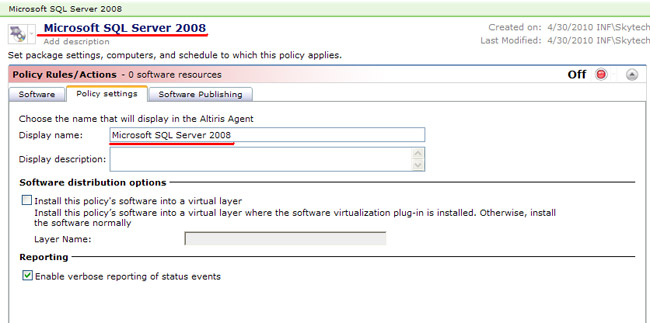
- Optionally change the name of the Managed Delivery Policy. To do this click on the Policy Settings tab of the policy and type the new policy name in the Display name edit box. Let's name our policy "Microsoft SQL Server 2008". Also change a policy name in the top of Managed Delivery Policy window.
- So, after all the policy should contain the "Microsoft SQL Server 2008" software resource, then a "Power Control - Restart" task and one more "Microsoft SQL Server 2008" software resource. Please, verify that the added tasks' sequence is correct. If it's not, please, use up or down arrow buttons on the Software tab toolbar to move the highlighted task node up or down in the tree.
- Add computer groups to which the policy rules will be applied and enforced, using the Applied to subsection.
- Also apply a schedule time for the systems to run the compliance check and the remediation. In 7.0 MR4 and 7.1, you have two schedules available, one for compliance check (this includes the download of the package), and a second for scheduling the execution for remediation. This allows users to have packages download prior to the scheduled execution time. Note that if a system is already compliance, no download or remediation will take place. This is based off of the detection rule specified for the software.
- Enable the policy by changing the On/Off toggle to the right of the Policy Rules/Actions bar.
Notes on Installing Microsoft SQL Server 2008
This section covers how the application will be installed. This is true for any installation that requires this type of configuration. Because we force a reboot to be done through the Policy instead of the installer, an error is associated with the first execution. Note the following points regarding this installation:
- On clients the first execution of the Managed Delivery policy fails, but this is expected. A restart is required to proceed with the Microsoft SQL Server 2008 installation, and after the first run fails, the policy will continue to evaluate as we have set up the necessary option in the Policy's Advanced Options, and a Restart Computer task will be performed after that. This is done by changing the option to Continue instead of Abort, to allow the reboot to occur.
- After the target machine is restarted, the policy continues to run for the second time, and finally Microsoft SQL Server 2008 will be successfully installed. The Managed Delivery Policy run succeeds, and status will be set to Compliant despite the first failure.
Conclusion
I hope this helps when installation software that requires a reboot as part of the installer's full installation. Note that all software may not act like SQL 2008 due to the logic or lack thereof in the installer in question, so all software may not work using this method.