In some cases, it is helpful to reinstall the SMP Agent for Unix, Linux and Mac without uninstalling the currently installed agent. Following is a description of two methods for overwriting the existing agent.
Note: In most cases it is preferable to uninstall the existing agent to guarantee removal of various configuration files. Using either of the methods shown in this article do not guarantee the removal of those corrupt configuration files.
Method 1: Using the aex-bootstrap configuration file
Directing the aex-bootstrap to reinstall the agent requires the use of a .aex-agent-install-config.xml file with a modified value. This file is obtained in the console at: Settings, All Settings, Agents/Plug-ins, Symantec Management Agent, Settings, Symantec Management Agent Install, then on the tab labeled ‘Install Agent for Unix, Linux and Mac’, (adding a computer and clicking the computer entry in the grid, if necessary) then clicking the button labeled ‘Installation Settings’.
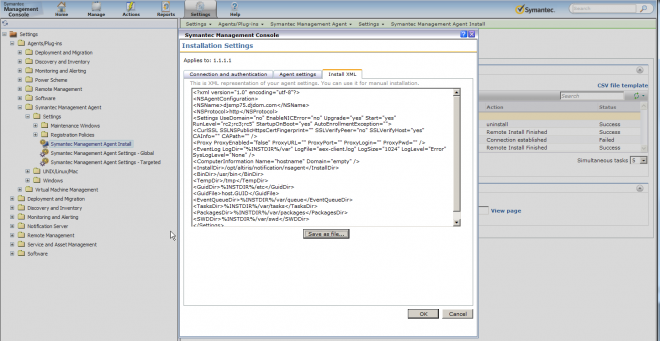
1. Save a copy of the .aex-agent-install-config.xml file. It will eventually need to be in a location that is accessible to the ULM clients. The …\NSCAP\temp directory is a good example.
2. Change the "Upgrade" entry from "yes" to "no”. After making this change, the file is ready to be used by the bootstrap to reinstall the agent. Note that the file contents are all on one line. Do not modify the files line endings or use any editor that adds formatting or other data to this file. Sample changed entry should appear as shown here:
…<Settings UseDomain=”no” EnableNICError=”no” Upgrade=”no”…
3. Copy the modified install config file and the aex-bootstrap-<platform> file to a local directory on the ULM client. They should be in the same directory. Note that the file begins with a dot or period, so it will be a hidden file on any ULM client. You can prove it exists by running ‘ls –al’ on the directory it was copied to.
4. Run aex-bootstrap* normally, e.g., "./aex-bootstrap <ns server name>".
The above process will pass the "-reinstall" option to the "agent-upgrade" script that performs the install using the native package files.
Method 2: Using the native package files and scripts
The bootstrap file does not contain the actual agent install files. Those files exists separate from the bootstrap in the NSCAP\bin\unix\agent\... directories. The files are installed by running the ‘agent-upgrade’ script from the corresponding directory.
To run an upgrade using the native package files:
1. Download the entire contents of the appropriate ‘agent’ directory using curl, wget, scp or any other appropriate method.
2. Make the scripts and package files executable.
3. Copy a .aex-agent-install-config.xml file to the same directory, if desired. This copy of the install config xml file does NOT have to be modified as in method 1, above. (If an install config xml is not used, then a manual configuration of the agent will be required. Using the install config xml allows the agent to be installed and configured in one step.)
4. Run the command: sudo ./agent-upgrade --reinstall. This will tell the installer to not check for an existing agent installation and to reinstall the agent, overwriting the existing files.