The upgrade process from Ghost Solution Suite 3.0 to 3.1 is fairly simple and Ghost Solution Suite 3.1 can be directly installed over top of Ghost Solution Suite 3.0.
*This guide informs on the upgrade process from Ghost Solution Suite 3.0 to 3.1. Please backup all information/databases and view the Ghost Solution Suite documentation before proceeding.
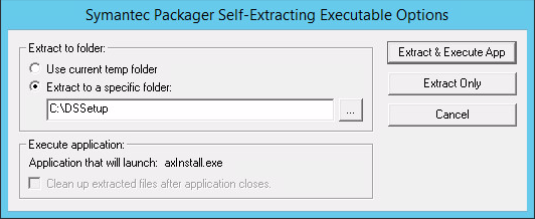
1. Download Symantec_Ghost_Solution_Suite_3_1.exe and select "Extract & Execute App", this will create the familiar DSSETUP folder in the directory that is selected.
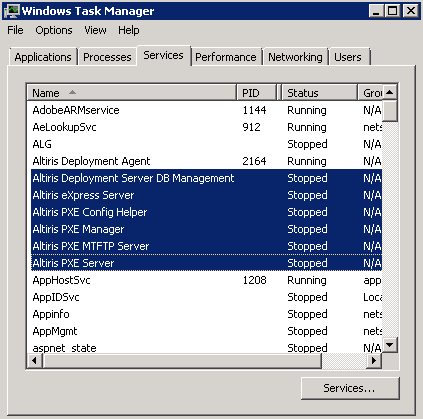
2. Stop all Ghost Solution Suite services before proceeding with install.
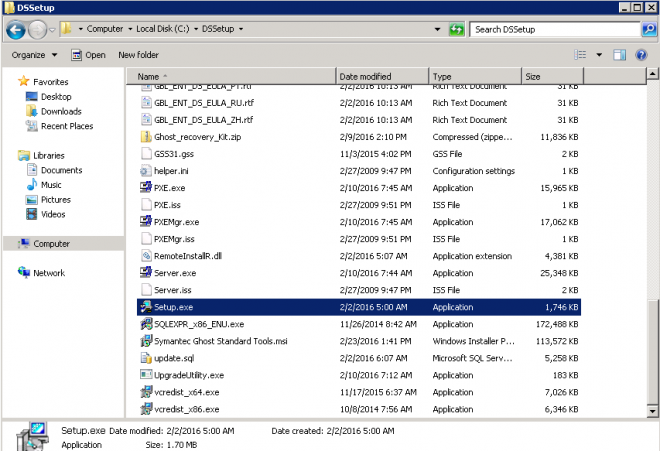
3. Navigate to the DSSETUP folder location and open this folder, the extracted location above was c:\DSSETUP. Navigate to Setup.exe within this folder and run as administrator.
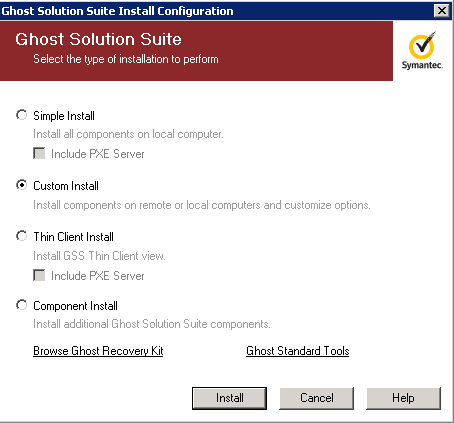
4. Select Custom Install to preserve the database from the Ghost Solution Suite 3.0 install.
5. Accept the Software License Agreement
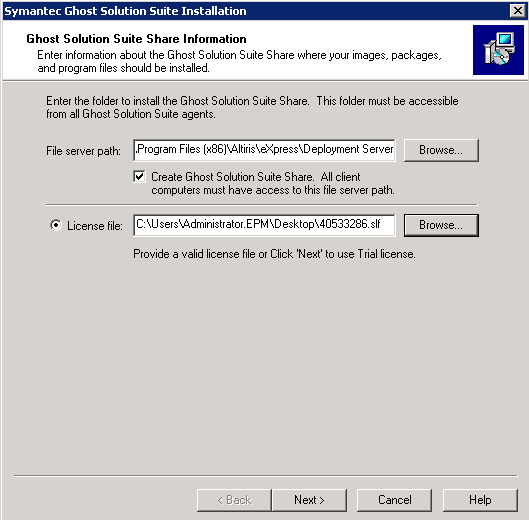
6. Select the location where Ghost Solution Suite 3.1 files should be saved, it is recommended to choose the location that Ghost Solution Suite 3.0 is installed at so files are overwritten and updated accordingly. Locate and link your license file in the prompt below.
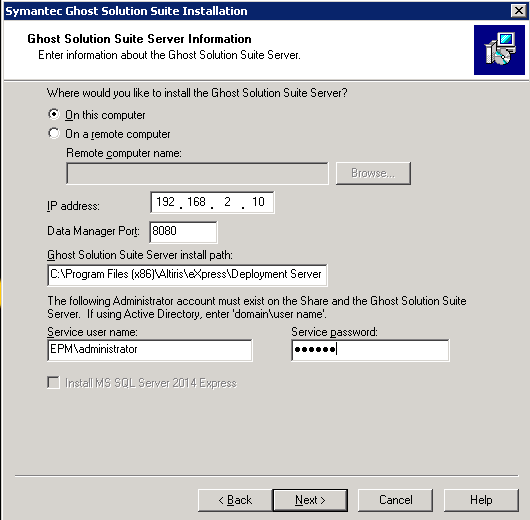
7. Verify the IP address and install path are correct and enter a administrator username and password. This can be either a local administrator or a domain administrator.
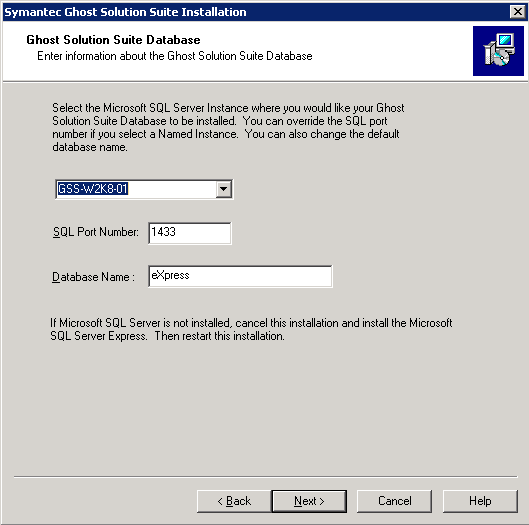
8. Verify that the server found is the correct server and that the database name matches the Ghost Solution Suite 3.0 database.
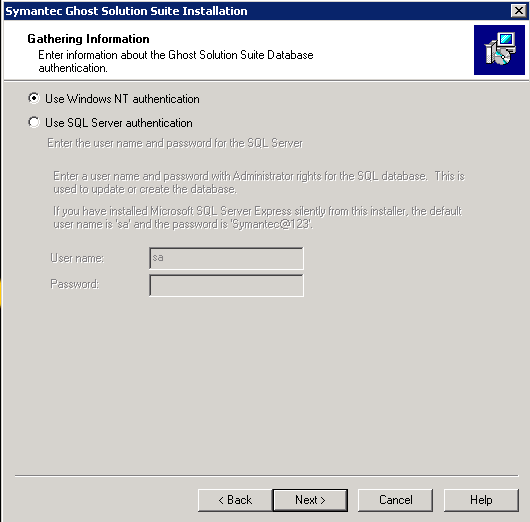
9. Select either Windows NT authentication or SQL server authentication
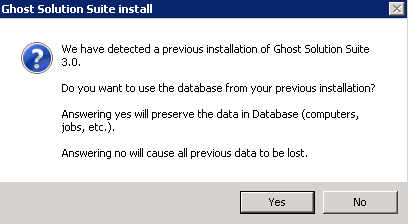
10. Select yes to the below notification, this ensures that the Ghost Solution Suite 3.0 database is used with the new Ghost Solution Suite 3.1 install.
.
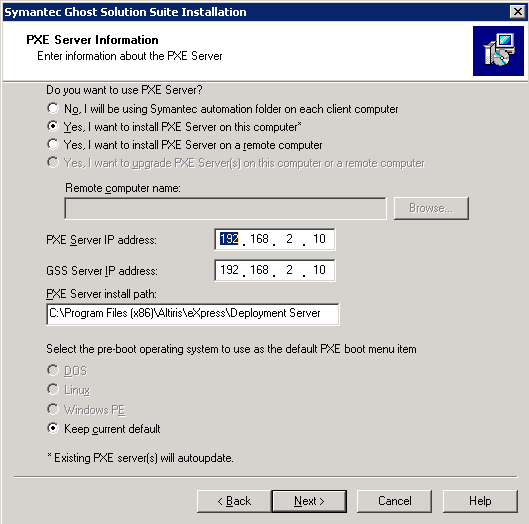
11. Configure PXE settings, by default the PXE server and GSS server use the same I.P address. Advanced installations may require changing the PXE server address to a different location.
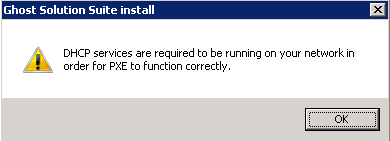
12. Select "Ok" when notified that a DHCP service is required for PXE to function correctly.
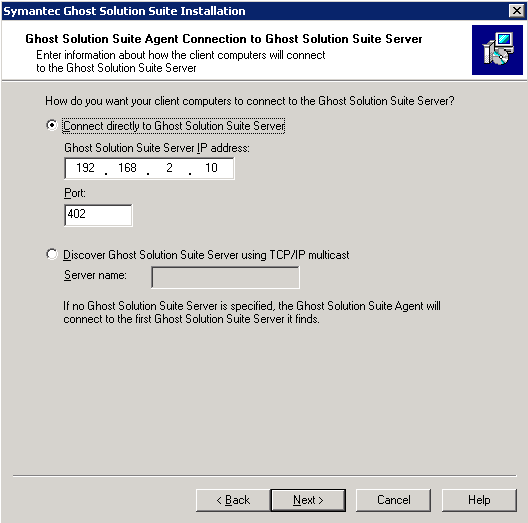
13. Verify the I.P. address matches the address provided earlier for the GSS server, this is where the default DAgent settings will point to.
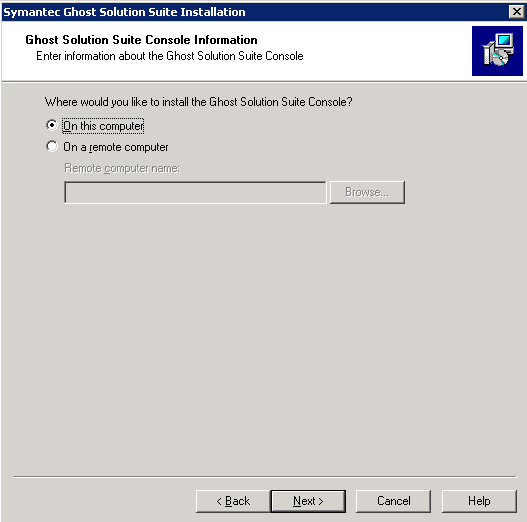
14. Select on this computer
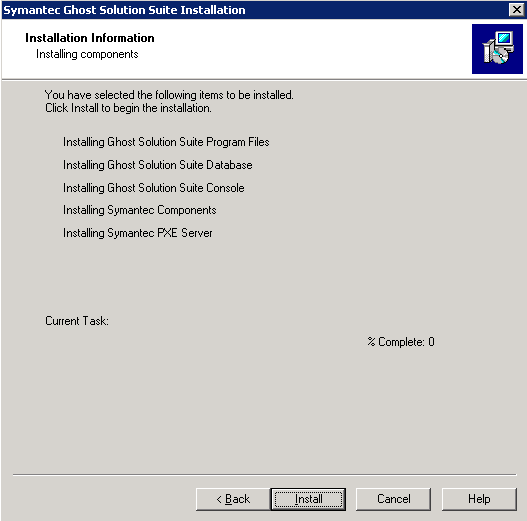
15. Select install
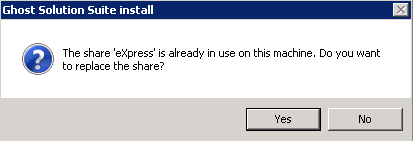
16. Select "Yes" to replace the eXpress share (Make sure all prior images are backed up to a different location before proceeding).
After this process completes, verify that all services have been restart and Ghost Solution Suite 3.1 should be correctly installed.