New File Auto Start
Component definition
This component watches a folder, and kicks off the workflow process when it detects that a file has been added. The New File Auto Start component works only in an auto start Workflow Project type, and takes the place of the Start component. This component is similar to the Folder Watch Start component. Except the New File Auto Start component can perform actions (move, delete, rename) on the new file internally before starting the workflow process.
Component icon
Description of component output paths
Unknown
The component output paths are described in the following table:
Property |
Description |
|
Unknown
|
Unknown
|
|
Unknown
|
Unknown
|
Description of component tabs and their properties
The properties on the File Watcher tab in the New File Auto Start component are listed and described in the following table:
The properties on the Input tab in the New File Auto Start component are listed and described in the following table:
The properties on the Monitoring tab in the New File Auto Start component are listed and described in the following table:
The properties on the Output tab in the New File Auto Start component are listed and described in the following table:
The properties on the Settings tab in the New File Auto Start component are listed and described in the following table:
Connection information
Not applicable
Component settings
Unknown
Use cases
Some examples for the New File Auto Start component are as follows:
-
New application notice
Whenever a paper employment application is submitted to a company, the application is scanned into a network folder. New Hire personnel are then notified of and given access to the new application.
-
Transcription task
A medical clinic asks patients to supply personal information on a paper form. The form is scanned and tasked to a remote transcription service. This service converts the information in a digital format by transcribing it in a Web form.
New application notice
Scenario: A nation-wide company offers a printable version of its online employment application. Often, people print this application, fill it out, and turn it in or mail it to the nearest branch location. Instead of mailing or faxing the application to the national Talent Acquisition office, the employee who receives the application scans it into a network folder. A workflow process automatically moves the file into a Talent Acquisition network folder, and notifies the responsible party through email.
Process: This process is created as an auto start Workflow Project type.
The following screen shot shows the process:
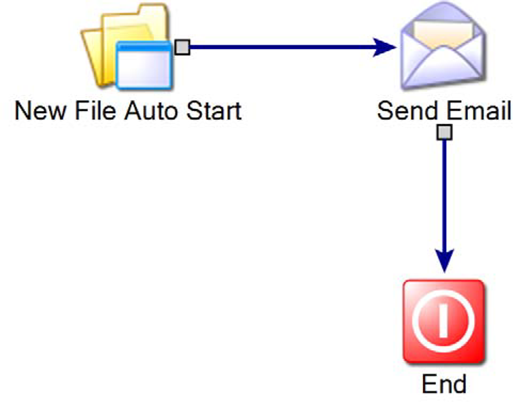
Because the New File Auto Start component moves the file, the process is relatively straight forward. When a new file (in this case a scanned application) is dumped into the folder that this component watches, the process begins.
The following screen shot shows the editor for the New File Auto Start component:
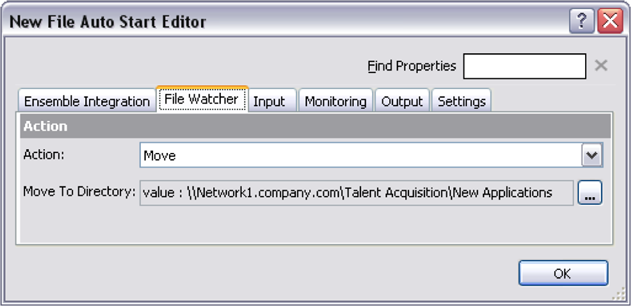
The component is set to move new files into a specified directory. This directory is the destination directory for the file.
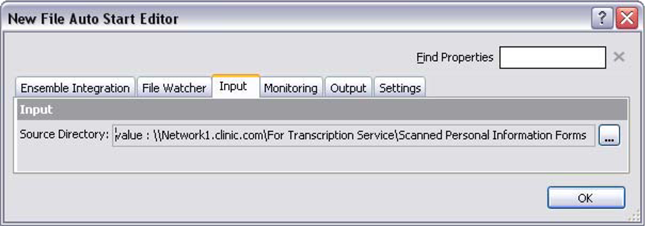
The following screen shot shows the New File Auto Start editor Input tab:
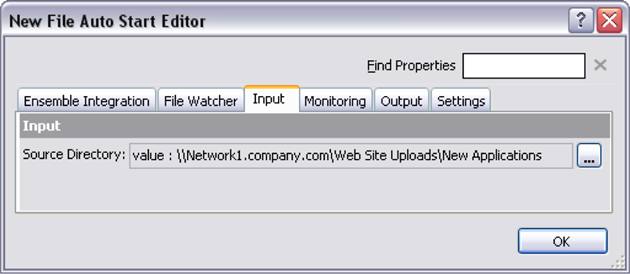
The Source Directory is the directory that the New File Auto Start component watches for new files.
First, the application file is moved from the main application-drop directory onto the Talent Acquisition directory. Then, a Send Email component sends a notification email to the responsible party.
The following screen shot shows the Send Email editor:
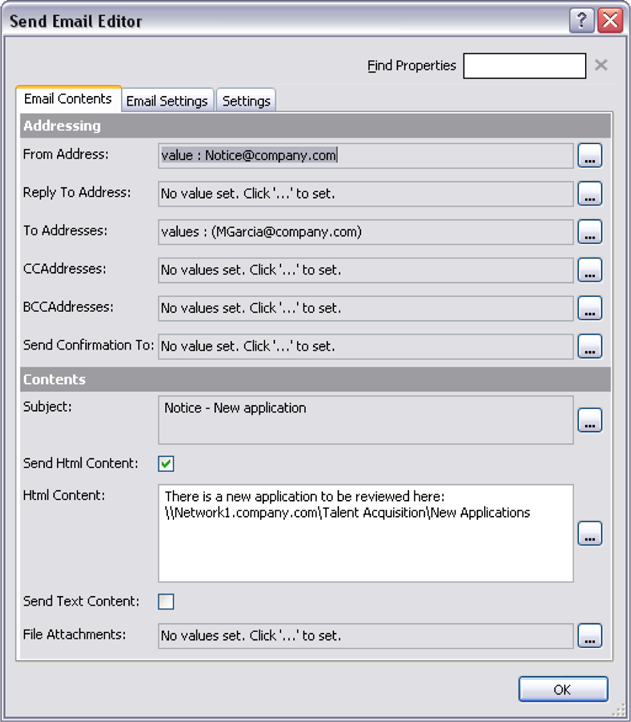
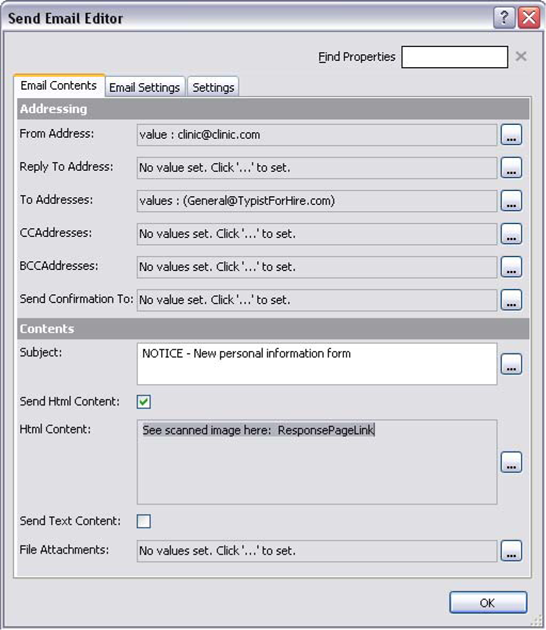
In the email body (HTML content), the destination directory is added to provide an instant link to the new application.
Manual step for including this link in the body of your email.
Copy the path from the New File Auto Start component editor and paste it into the HTML content field of the Send Email component editor.
Other components in this example are as follows:
Transcription task
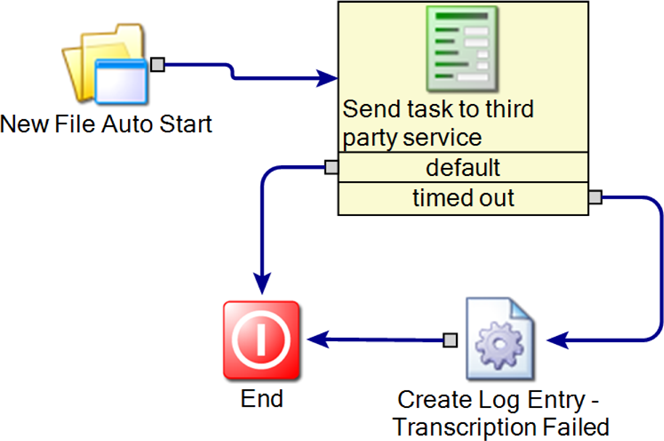
Scenario: A medical clinic serves patients of all ages and backgrounds. Many patients are not comfortable using computer equipment and are not proficient at typing. To accommodate everyone, the clinic continues to use paper forms for patients to fill out personal information. The clinic uses a third-party transcription service to convert the forms into a digital format. When a patient turns in a paper form, a worker at the clinic scans the form into a network folder. A workflow process recognizes the new file, creates a task, and sends a notice email to the third-party service. The third party accesses the scanned image in a Web form, and transcribes the information into a digital form.
Process: This process is created in an auto start Workflow Project type.
The following screen shot shows the process:
The following screen shot shows the editor for the New File Auto Start component:

The component is set to move new files into a specified directory. This directory is the destination directory for the file.
The following screen shot shows the New File Auto Start editor Input tab:
The Source Directory is the directory that the New File Auto Start component watches for new files.
The following screen shot shows the New File Auto Start editor Output tab:

The component creates a process variable, FileData. This variable contains the new file (in this case a scanned image) that started the process.
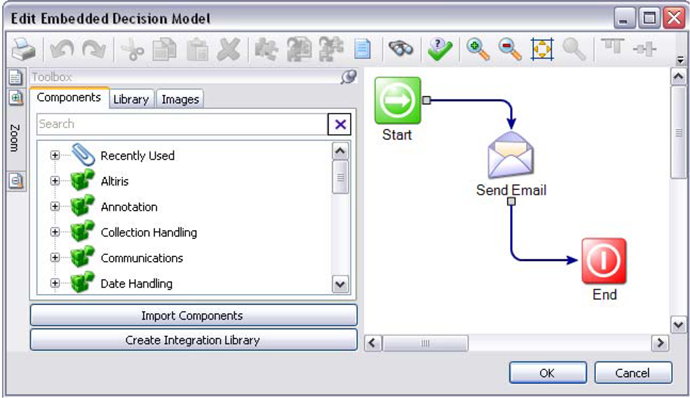
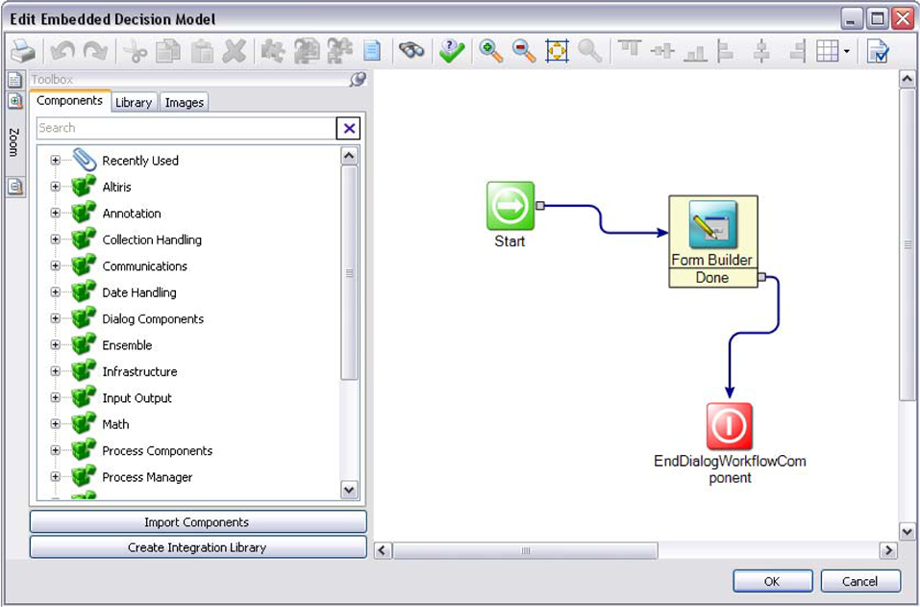
After the New File Auto Start component starts the process, a Dialog Workflow component is invoked. This component creates a task and sends it to the third-party service through email. The Dialog Workflow component uses its Start Process to send the email.
The following screen shot shows the Dialog Workflow start process:
The Send Email component sends an email that includes a link to view the scanned image. The link is called ResponsePageLink. For more information on setting up an email to include this link, see the following link:
The following screen shot shows the email editor:
When a user clicks the ResponsePageLink, a Web form containing the scanned image appears. This Web form is created in the Dialog Model of the Dialog Workflow component.
The following screen shot shows the Dialog Model:
The following screen shot shows the form of the Form Builder component:
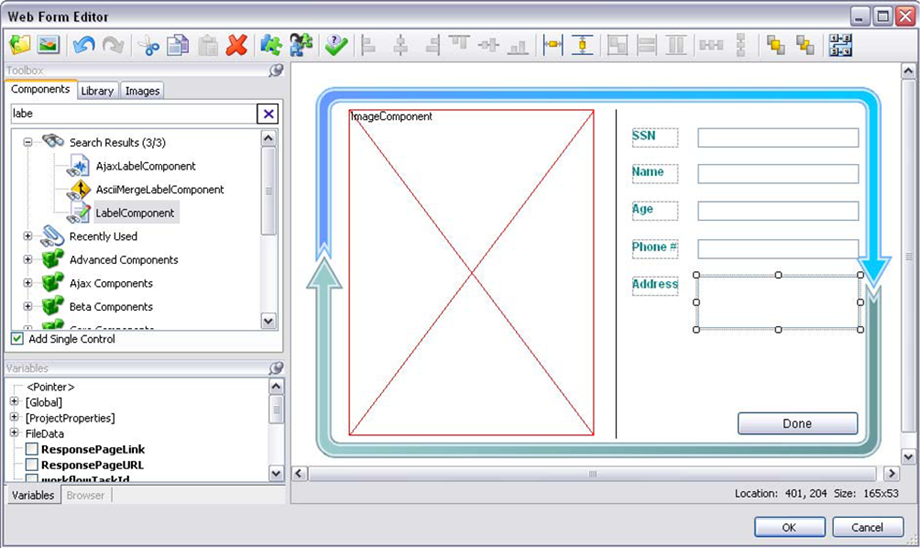
On the left side, an ImageComponent displays the scanned personal information form. The right side has boxes for entering data. Once the data is entered, it can be stored in a database.
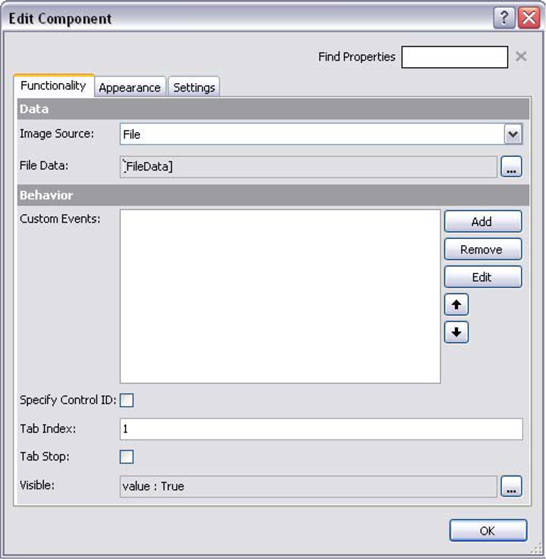
The ImageComponent retrieves the image to display from process data.
The following screen shot shows the ImageComponent editor:
If the transcription process fails, a logging component records the failure so corrective measures can be taken. This logging component creates a log entry that appears in the Configuration and Logging Tool. Access the tool at Start > All Programs > Symantec > Workflow > Workflow Designer > Tools > Workflow Explorer.
Other components in this example are as follows:
Dialog Workflow
Create Log Entry
Send Email
Form Builder
Image Component