The SEV Agent is installed on all computers where you want to stream applications. The SEV Agent connects to the Streaming Server, authenticates users, and manages streamed applications on the computer.
The SEV Agent also installs the Workspace Virtualization Agent.
SEV Agent installer has a combined installer of SWS & SWV agents.
It can be installed in the following list of Operating Systems:
- Windows XP SP2 or greater
- Windows 7 - 32 & 64 bit OS
- Windows Vista - 32 & 64 bit OS
- Windows 2003 SP1
- Windows Server 2003 R2
- Windows Server 2008 - 64 bit OS
Different Client deployment methods:
- Installing Streaming client through Portal
- Silent / Script based installation of streaming client
- Installing the SEV Agents manually through GUI
Installing Streaming client through Portal
Launch IE browser and connect to the Streaming Portal (http://servername), the Streaming Portal automatically detects if the SEV Agents are installed on the computer. If the SEV Agents are not installed, you are prompted to install them automatically. This installation requires the computer to be restarted.
Pre requisites for installing Streaming Client through Portal:
- The current Windows user should be authorized to run ActiveX controls.
- Your Streaming Server should be added to the Trusted Sites Zone in Internet Explorer.
- If you are using Automatic login, the current Windows user must be logged on to the domain. If you are using manual authentication, the user must have a username and password assigned in the Streaming Console.
To override the default installation settings edit 'setupcfg.txt' file in the server.
Note: By default, Setupcfg.txt file can be found in the following location in the server machine:
Program Files\Symantec\Workspace Streaming\Server\launchserv\webapps\launchserv\new\setupcfg.txt).
Options in setupcfg file:
Setupcfg file lets you customize the Workspace Streaming and Workspace Virtualization Installation settings.
Options for altering the installation settings for Virtualization Agent:
| Installation option |
Description |
| SWV.ADDLOCAL = SVS_Admin |
Installs the Workspace Virtualization Admin tool. |
| SWV.ADDLOCAL = SDK |
Installs Virtualization SDK Libraries, Headers and sample code for Developing Symantec Workspace Virtualization tools/apps. |
| SWV.ADDLOCAL = SVS_Admin, SDK |
Installs the Workspace Virtualization Admin tool & Virtualization SDK Libraries, Headers and sample code for Developing Symantec Workspace Virtualization tools/apps. |
| SWV.PRODUCT_KEY = <SWV Product key> |
This is optional, it specifies the SWV product key. If not specified the default key bundled with the installation will be used. |
| SWV.INSTALLDIR = <inst loc> |
Changes the default installation path for Workspace Virtualization. |
| SWV.DEFAULT_FILE_REDIR = <inst loc> |
Changes the installation location of the Workspace Virtualization redirect folder. |
Table 1
Options for altering default settings for SEV Agent:
| Installation option |
Description |
| SWS.CACHE = <Altered installation location> |
Changes the installation location of the SEV Agent's Cache folder |
| SWS.BIN = <Altered installation location> |
Changes the installation location of the SEV Agent's Bin folder. |
| SWS.STS_SERVER = Server Name |
Name of the Streaming Server to which the SEV Agent connects. |
| SWS.LAUNCH_SERVER_URL = Server URL |
Determines the server to be contacted after installation to pre-populate icons and packages. (Ex - http://Servername) |
| SWS.STS_SERVER_PORT = Server Port |
Port number of the Portal,default port is 80. |
| SWS.USER_NAME = User name |
Specifying User name Determines the user name to be used for pre-population provisioning. |
| SWS.PROXY_USAGE = proxy settings, (BROWSER or No) |
Determines proxy settings, use BROWSER to use the settings defined in Internet Explorer or use NO to not use a proxy. |
Table 2
Silent / Script based Installation of Streaming agents
Method - I
To install the Streaming Agents through silent installation:
In SWS product installer folder - Disk1, Under the "Client" folder, copy the following files to a common location:
- SEVAgents.exe
- setupCfg.txt
Now, modify setupcfg.txt to provide the location of your Streaming Server and all other installation options and save it.
In the Setupcfg file, all parameters in Table - 1 & 2 shall be used to alter the client installation.
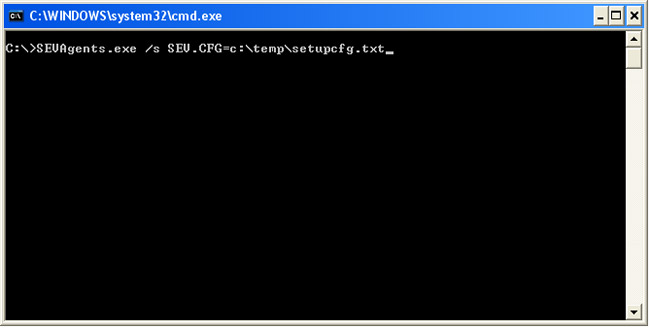
In the command prompt of the client machine, enter the following command:
C:/ <SEVAgents.exe _ absolute path> /s <SEV.CFG=setupcfg.txt file location>
Ex - C:\> SEVAgents.exe /s SEV.CFG=d:\temp\setupcfg.txt :
Method - II
We can also write a batch file to install the client, specifying all setupcfg file containing all parameters to alter the default installation.
The batch file can be set to return a error code, based on the result of the installation, which can be used to spot the reason for install failures.
Sample batch file:
@echo off
SEVAgents.exe /s sev.cfg=C:\setupcfg.txt
echo %errorlevel% > c:\temp\result_log.txt
These are some of the common MSI installer error levels returned, and will be saved to the result_log.txt file:
| 0 |
Action completed successfully. |
| 1603 |
Fatal error during installation. |
| 3010 |
Installation Success & a restart is required to complete the installation. |
| 1618 |
Another installation is already in progress. Complete that installation before proceeding with this install. |
| 1640 |
Installation from a Terminal Server client session not permitted for current user. |
Method - III
Instead of saving all parameters to the Setupcfg file, they can also be entered in the command prompt as follows:
C:/><SEVAgents.exe _ absolute path> /s <all intended parameters>

All these Client installations require the computer to be restarted.