Create a Deployment Solution 7.5 Boot Disk
Reviewing the Symantec Deployment Solution User guide for 7.5 listed here www.symantec.com/business/support/index?page=content&id=DOC5678 there isn’t clear instructions for using Boot Disk Creator, just that it exists. I would assume this is because they feel a majority will be using PXE/Symantec Netboot Services. For now, our organization still relies on boot disks as a CD or USB drive. Depending on the systems you are deploying images to that you know how to create both.
Boot disk creator will run remotely, albeit slowly, if you have access to the location that it is installed. If you do not have physical network access, ask your network admin to make the location a shared folder so that you can run it remotely.
Why will you have to run it remotely? Aside from access issues, in our case the NS is a virtual server and it’s not just a case of walking up to it in your data center and plugging in the USB drive and vsphere, is very limited on what it can access as far as clipboard and hardware on a tech's computer and connecting those to VMs. If you do not need to create a USB disk, and prefer an ISO it will be in the best interest of time and resources to be logged in directly to the NS through RDP, or other remote access software, and running boot disk creator locally to the NS.
Before we get started there are a few things to think about:
- The pre-boot environment used in DS 7.5 is WinPE 4.0. This means that if you have drivers that Symantec didn’t preload for you, you will need to have them ready when we get to the part of adding drivers to the driver database.
- If you require anything other than DHCP for your Automation environment, you will either need to know how to reconfigure this with cmd line (after it tries for a decade to configure DHCP in automation) or tinker around with it in Boot disk creator.
The install on the NS path for boot disk creator is
<Install Directory>\Program
Files\Altiris\Deployment\BDC\Bootwiz\bootwiz.exe
The NS, and I understand why even if I dont like it, is the only location for boot disk creator in 7.5. In 7.1 it was available on any deployment server via the deployment share, however in the new environment the deployment share no longer exists on task & package servers. Well, sort of, you may find it here:
\\ Program Files\Altiris Agent\Agents\Deployment\SBS\Bootwiz\{guid}\cache\bootwiz
Changes made to Boot Disk Creator on Task Servers, or if you copy the bootwiz directory to your technician computer and run it there, do not affect the NS.
OK, on with the show! Open bootwiz.exe. You may have to run it from an admin level command prompt.
Boot Disk Creator Wizard starts…
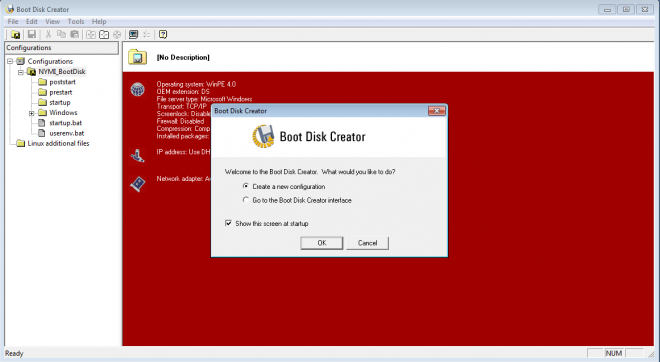
If you haven’t run the creator yet, you will want to choose “Create a new…” Otherwise, go to the interface and edit a previous configuration.
With a New configuration Fill in the blanks, Select your OS and OEM extensions:

At this point you wait for the driver database to be opened up. If you haven’t already, disable any IPS software. McAfee HIPS doesn’t like boot disk creator very much. This is a problem if you are executing bootwiz from a remote system and will prevent you from going any further. The wait time for the driver database to open can take any unkown amount of time depending on whether you are accessing bootwiz remotely, or the resources available on the NS.
Once opened, this is where you can review what drivers will be loaded in your boot disk.

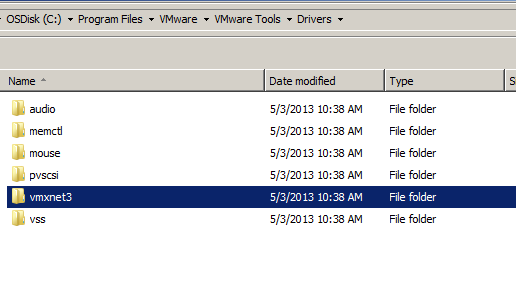
If you have to add any, select Have Disk… If you are building your images in vmware products you will need to add drivers for those here. The drivers can be found on any system that has vmware tools installed. You shouldn’t have a problem with any Intel E1000 NIC’s, but I did have to add a driver for VMXNET3 and PVSCSI (Para virtual SCSI) to my boot disk in order to capture images from machines I had built in VSPHERE. Since my NS has vmware tools installed, I was able to grab the drivers lfrom the NS itself. Make sure you add drivers that are compatible with Winpe 4.0 & match the architecture. Vmware drivers can be found in these folders according to vmware's own documentation:
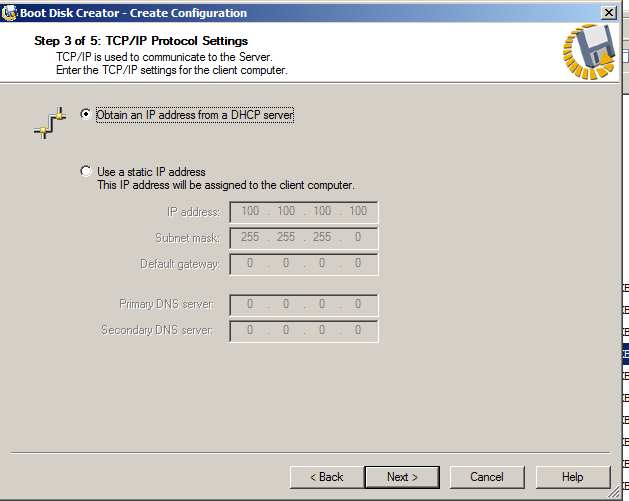
Click next and you will have the option of selecting DHCP or Static for your boot disc. For capturing one particular image I needed a static IP address and this will all depend on your enviroment. Most will use DHCP. Static selection presented some problems for me because the bat file generated for the static option didn’t work as well as i thought it would because the network device on my vm that I wanted to capture didn’t use the same name that is written in to the bat. Fortunately, you can modify this later.
Click next and wait again. Add any optional components here…
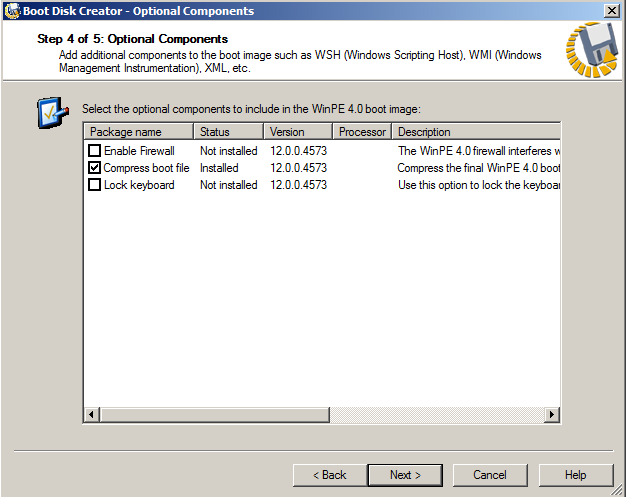
And lastly, review and finish!
As I mentioned, if you do decide to go static for your network adapter, you may have to modify it. The default name that Symantec had written in didn’t match my VM and so I changed it here. You can also just use DHCP, wait an hour for it to time out and then type the commands in manually yourself and then once configured properly rerun runagent.bat once in automation.

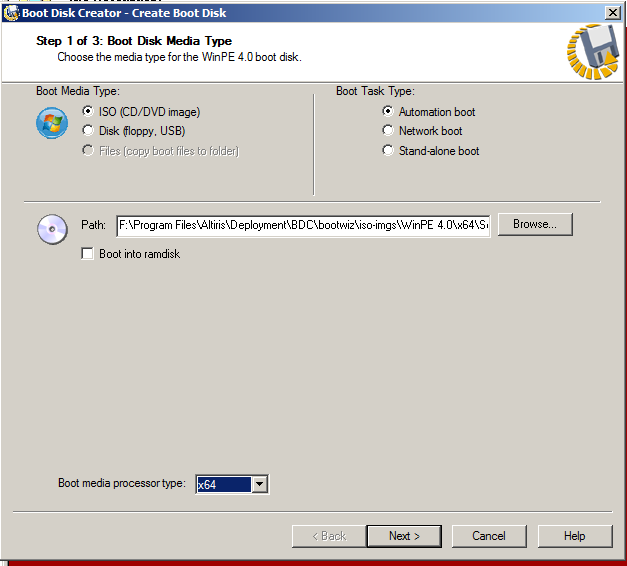
Once you are ready to make your boot disk right click on the configuration you made and select “Create Boot Disk”
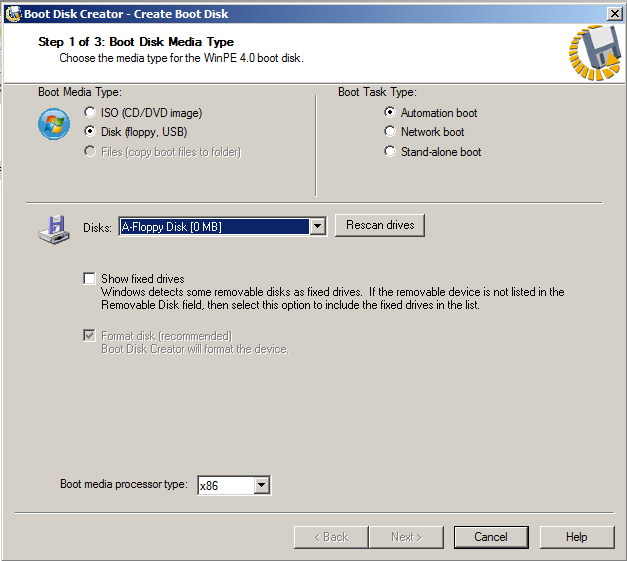
Select the values you prefer. Some systems you will need an ISO, and some a USB, some it doesn’t matter. I always run through twice and make both so that I have them. Also, select the compatible processor and select next.
If you select USB, you will have to make sure it detects the right drive before you continue.
From here it will start to compile

Once done either burn or mount and test!
Once you are confident in you are boot disk you created you can make more.You can use the ISO to burn more CD's, or you can can capture a GHO image file of your USB boot disk using ghost.exe and imaging more USB drives with that GHO image file. Also, using ghost explorer you can then add files and folders to your GHO image as time goes on, just keep in mind the size of the USB drive you are using and to not go over it.