This is for Workflow/ServiceDesk 7.2 SP2. This may work in earlier versions but I have not tested.
Downloadable version is attached at the end of this article
When a user reopens a resolved ticket, the assignment goes to a default group and not to the worker who resolves the ticket. If you want the ticket to go back to the resolver, here is the workflow I use.
The workflow below uses a group in case there is a decision for another group to review reopens default tickets instead of the default group. The global variable will make it easy to update and I will call it the "catch all group."
You will need to modify the workflow in the IncidentManagement and ReopenIncident modules. The instructions for ReopenIncident are the same as in the IncidentManagement. The instructions were copy and pasted in to ReopenIncident for reference.
As with any workflow changes, please back up current projects and test when possible.
Catch All Group
First, you want to identify the "catch all" group, just in case there is an issue with trying to assign the ticket back to the resolver.
1. Go in to process manager.
2. Select Admin → Users → List Groups
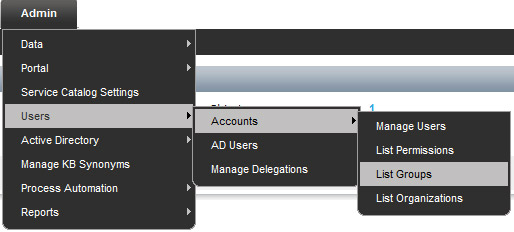
3. Find the group you want to be the "catch all" group (like Support I or Support II).
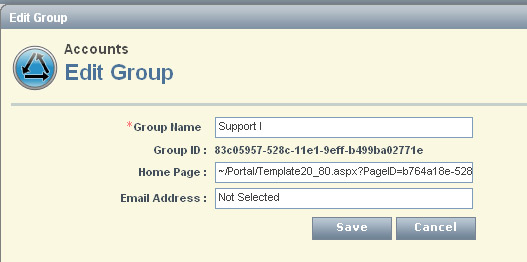
4. Click on the action bolt and select edit.

5. You want to copy the Group Name and Group ID in to notepad. You will need to paste this later on in this document.
Incident Management Workflow
Set up the Catch All Group
Edit the SD.IncidentManagement project


1. Click on SD.IncidentManagement in the project pane.
2. Click on the Global Data tab.
3. Click on Add
4. On the new line created, type in a name of the variable (I named mine "GLOBAL_Support_I")
5. Click on the ellipses in the Type column.
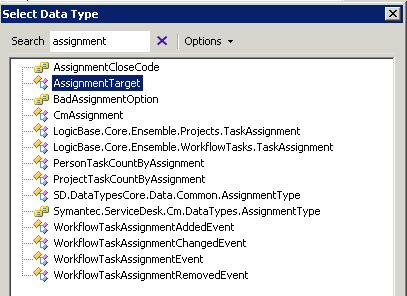
a. Type in the word "assignment" in the search box.
b. Select "AssignmentTarget" from the list.
c. Click OK.

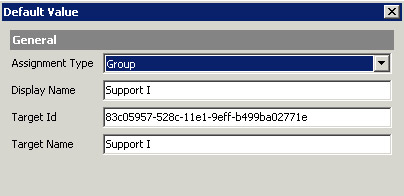
6. Click on the ellipses in the Default Value column.
a. Assignment Type is Group
b. Display and Target Name is the group name you have on your notepad from section one of this document.
c. The Target ID is the Group ID you have on your notepad from section one of this document.
Customer Confirm Resolution Model

In the project pane select:
Model: Customer Confirm Resolution
Screenshot of model
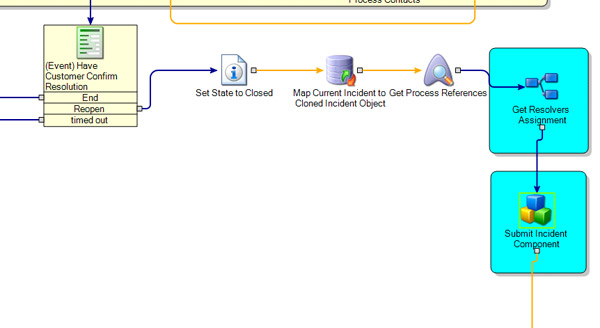
You want to add the Get Resolvers Assignment EmbeddedModelComponent right after "Get Process References" and before "Submit Incident Component". The screenshot above has a modified title for Submit Incident Component and other components not related to this document are removed.
Embedded Model Component - Get Resolvers Assignment
After adding the component, edit the component properties (right click and edit component)

1. On the Settings tab, name the component "Get Resolvers Assignment".
2. On the Configuration Tab...
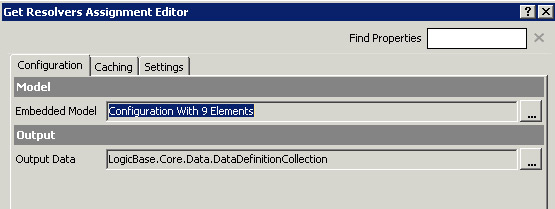
3. Click the elipses next to Output Data
4. Click on Add

a. Type ResolvedAssignmentTarget as the Name
b. Click on the ellipses under Type

i. Type in the word "assignment" in the search box.
ii. Select AssignmentTarget from the list.
iii. Click OK.
5. Click OK to get out of the parameters box.
6. Right click on Get Resolvers Assignment, edit model.
Model - Get Resolvers Assignment
This is what the model should look like after you build it. Please refer to this picture when adding or editing the components.
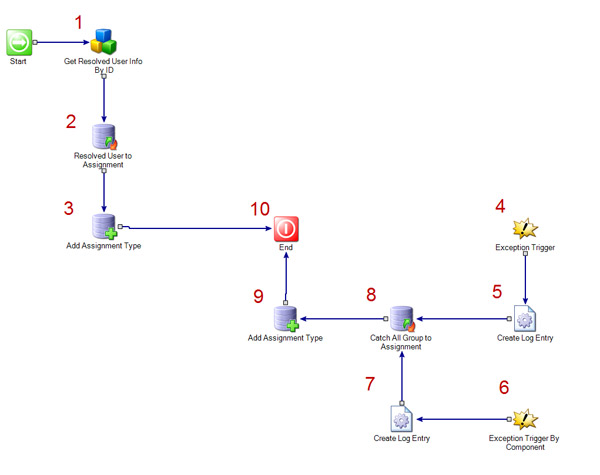
1. Add a GetUserInfoByID component.
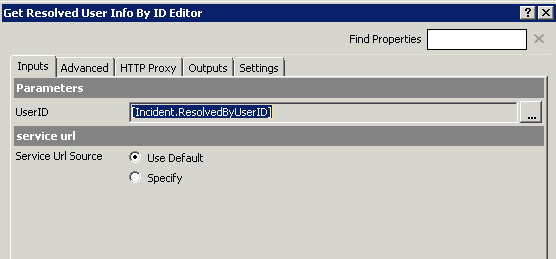
a. On the settings tab, name the component "Get Resolved User info by ID"
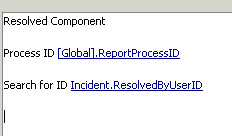
b. On the Inputs tab, click on the ellipses next to the UserID field and select "Incident.ResolvedByUserID"
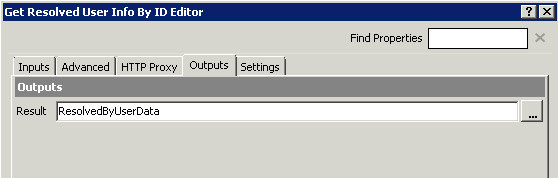
c. On the Outputs tab, type in "ResolvedByUserData"
2. Add a SingleValueMappingComponent
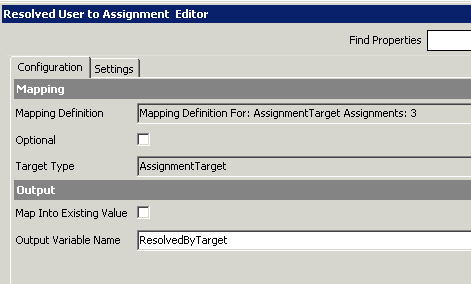
a. On the settings tab, name this component "Resolved User to Assignment"
b. On the configuration tab
i. Click the ellipses next to "Target Type"

1. Type in the word "assignment" in the search box.
2. Select AssignmentTarget from the list.
3. Click OK.
ii. Click on the Ellipses for Mapping Definition.
Map the following values from ResolvedByUserData
. DisplayName to DisplayName
. PrimaryEmail to TargetName
. UserID to TargetID

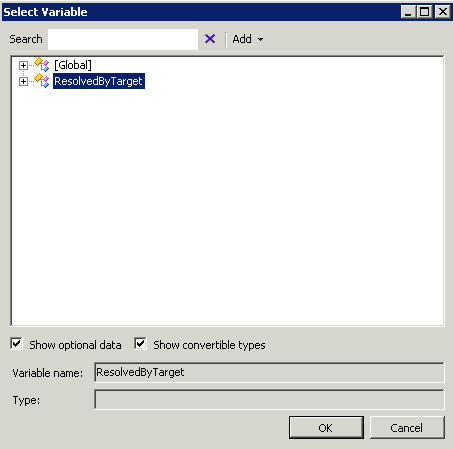
iii. Type in "ResolvedByTarget" on the Output Variable Name
3. Add InsertDataComponent
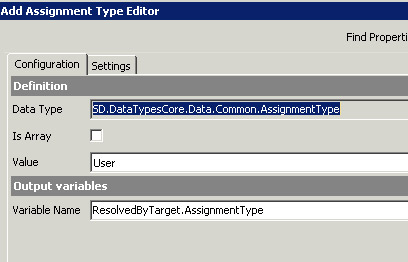
a. On the Settings tab, name the component "Add Assignment Type"
b. On the Configuration tab
i. Click the ellipses next to data type.
ii. Search for AssignmentType (Type not target). Use similar steps as above on how to search and select types.
iii. Value is type User
iv. Variable name is "ResolvedByTarget.AssignmentType"
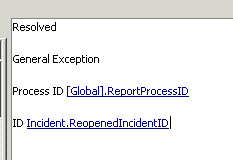
4. Add Exception Trigger Component

a. On the trigger tab, check "Put error in error log". This is optional but highly suggested during test.
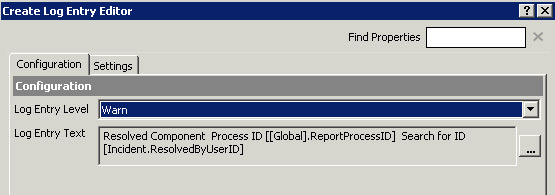
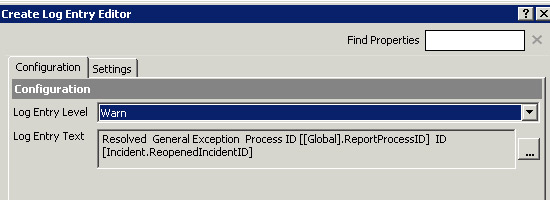
5. Add CreateLogEntryComponent

a. Set the Log Entry Level to Warn (can downgrade after testing)
b. Change the Log Entry Text to add descriptive information for the general exception error.
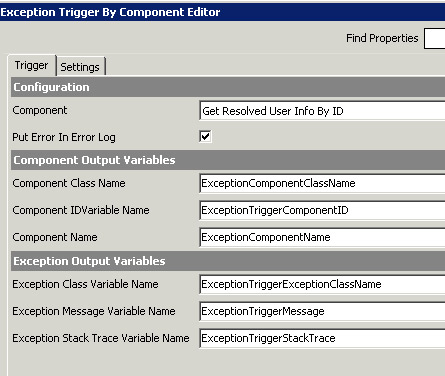
6. Add Exception Trigger By Component

i. On the Trigger tab
a. Select the Get Resolved User info By ID component.
b. Check "Put error in error log" (suggested for testing)
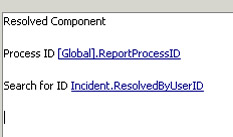
7. Add Create Log Entry
a. Set the Log Entry Level to Warn (can downgrade after testing)
b. Change the Log Entry Text to add descriptive information for the component exception error.
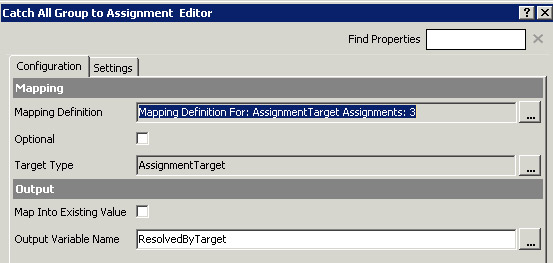
8. Add SingleValueMappingComponent

i. On the settings tab, name the component "Catch All Group to Assignment"
ii. On the Configuration tab
a. On the settings tab, name this component "Resolved User to Assignment"
b. On the configuration tab
i. Click the ellipses next to "Target Type"
1. Type in the word "assignment" in the search box.
2. Select AssignmentTarget from the list.
3. Click OK.
ii. Click on the Ellipses for Mapping Definition.
Map the following values from
Global_Support_I (or whatever you named your catch all group)
. DisplayName to DisplayName
. TargetName to TargetName
. TargetID to TargetID

9. Add InsertDataComponent
a. On the Settings tab, name the component "Add Assignment Type"
b. On the Configuration tab
i. Click the ellipses next to data type.
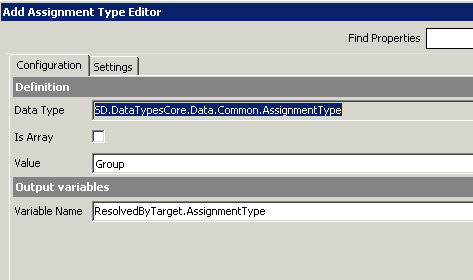
ii. Search for AssignmentType (Type not target). Use similar steps as above on how to search and select types.
iii. Value is type Group
iv. Variable name is "ResolvedByTarget.AssignmentType"
10. Edit the End Component
a. On the Configuration Settings, click the elipses next to "ResolvedAssignmentTarget"
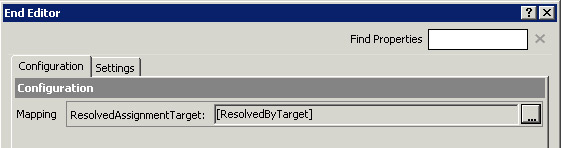
b. Select "Value from Data"
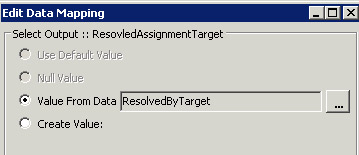
c. Select ResolvedByTarget

Modify the Submit Incident Component
1. On the configuration tab, click on the ellipses next to "Specific Assignment"
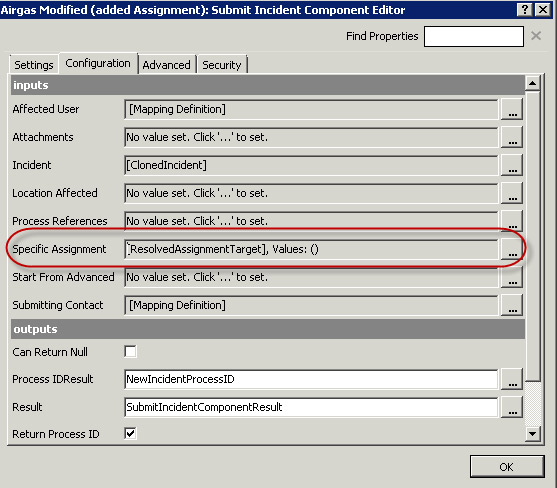
2. Only have "Process Variables" checked off.
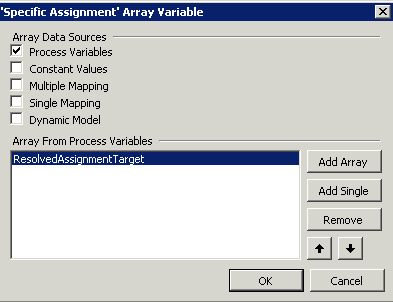
a. Click on "Add Single"
b. Select ResolvedAssignment
Close and save the model you are in.
Save and publish the project.
Reopen Incident Workflow
Set up the Catch All Group
Edit the SD.ReopenIncident project
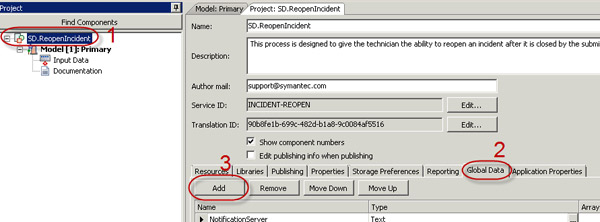

1. Click on SD.ReopenIncident in the project pane.
2. Click on the Global Data tab.
3. Click on Add
4. On the new line created, type in a name of the variable (I named mine GLOBAL_Support_I)
5. Click on the ellipses in the Type column.
a. Type in the word "assignment" in the search box.
b. Select AssignmentTarget from the list.
c. Click OK.

6. Click on the ellipses in the Default Value column.
a. Assignment Type is Group
b. Display and Target Name is the group name you have on your notepad from section one of this document.
c. The target ID is the Group ID you have on your notepad from section one of this document.

Primary Model
In the project pane select:
Model: Primary
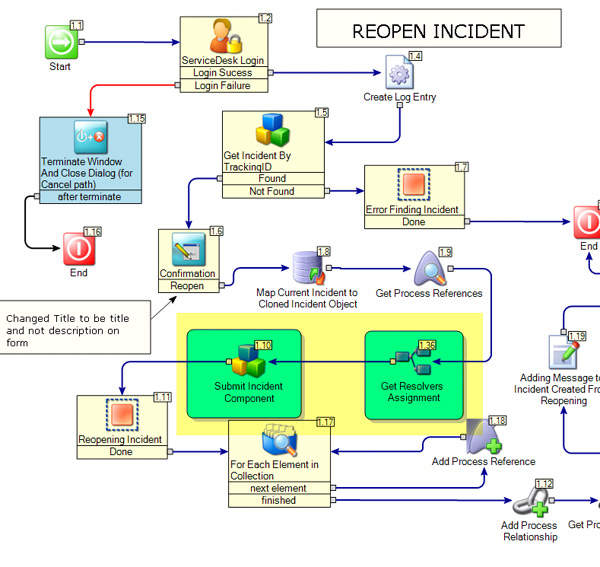
You want to add the Get Resolvers Assignment EmbeddedModelComponent right after "Get Process References" and before "Submit Incident Component". The components added and modified are in green in the screenshot.
Embedded Model Component - Get Resolvers Assignment
After adding the component, edit the component properties (right click and edit component)
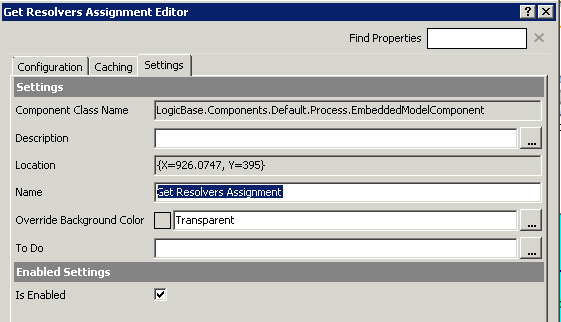
1. On the Settings tab, name the component "Get Resolvers Assignment".
2. On the Configuration Tab...

3. Click the elipses next to Output Data
4. Click on Add

a. Type ResolvedAssignmentTarget as the Name
b. Click on the ellipses under Type

i. Type in the word "assignment" in the search box.
ii. Select AssignmentTarget from the list.
iii. Click OK.
5. Click OK to get out of the parameters box.
6. Right click on Get Resolvers Assignment, edit model.
Model
This is what the model should look like after you build it. Please refer to this picture when adding or editing the components.

1. Add a GetUserInfoByID component.

a. On the settings tab, name the component "Get Resolved User info by ID"
b. On the Inputs tab, click on the ellipses next to the UserID field and select "Incident.ResolvedByUserID"
c. On the Outputs tab, type in "ResolvedByUserData"

2. Add a SingleValueMappingComponent

a. On the settings tab, name this component "Resolved User to Assignment"
b. On the configuration tab
i. Click the ellipses next to "Target Type"

1. Type in the word "assignment" in the search box.
2. Select AssignmentTarget from the list.
3. Click OK.
ii. Click on the Ellipses for Mapping Definition.
Map the following values from ResolvedByUserData
. DisplayName to DisplayName
. PrimaryEmail to TargetName
. UserID to TargetID

iii. Type in "ResolvedByTarget" on the Output Variable Name
3. Add InsertDataComponent

a. On the Settings tab, name the component "Add Assignment Type"
b. On the Configuration tab
i. Click the ellipses next to data type.
ii. Search for AssignmentType (Type not target). Use similar steps as above on how to search and select types.
iii. Value is type User
iv. Variable name is "ResolvedByTarget.AssignmentType"
4. Add Exception Trigger Component
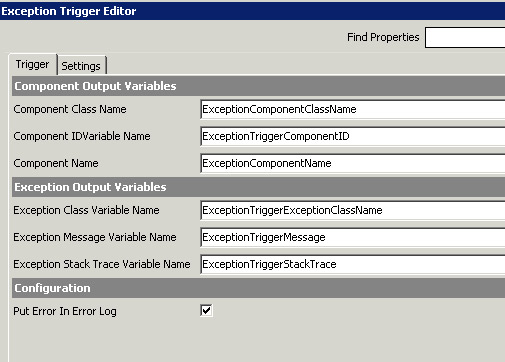
a. On the trigger tab, check "Put error in error log". This is optional but highly suggested during test.
5. Add CreateLogEntryComponent
a. Set the Log Entry Level to Warn (can downgrade after testing)
b. Change the Log Entry Text to add descriptive information for the general exception error.

6. Add Exception Trigger By Component
i. On the Trigger tab
a. Select the Get Resolved User info By ID component.
b. Check "Put error in error log" (suggested for testing)
7. Add Create Log Entry

a. Set the Log Entry Level to Warn (can downgrade after testing)
b. Change the Log Entry Text to add descriptive information for the component exception error.
8. Add SingleValueMappingComponent
i. On the settings tab, name the component "Catch All Group to Assignment"
ii. On the Configuration tab
a. On the settings tab, name this component "Resolved User to Assignment"
b. On the configuration tab
i. Click the ellipses next to "Target Type"

1. Type in the word "assignment" in the search box.
2. Select AssignmentTarget from the list.
3. Click OK.
ii. Click on the Ellipses for Mapping Definition.
Map the following values from Global_Support_I (or whatever you named your catch all group)
. DisplayName to DisplayName
. TargetName to TargetName
. TargetID to TargetID

9. Add InsertDataComponent

a. On the Settings tab, name the component "Add Assignment Type"
b. On the Configuration tab
i. Click the ellipses next to data type.
ii. Search for AssignmentType (Type not target). Use similar steps as above on how to search and select types.
iii. Value is type Group
iv. Variable name is "ResolvedByTarget.AssignmentType"
10. Edit the End Component
a. On the Configuration Settings, click the elipses next to "ResolvedAssignmentTarget"

b. Select "Value from Data"

c. Select ResolvedByTarget
Modify the Submit Incident Component
1. On the configuration tab, click on the ellipses next to "Specific Assignment"

2. Only have "Process Variables" checked off.

a. Click on "Add Single"
b. Select ResolvedAssignment
Close and save the model you are in.
Save and publish the project.