You will need a backup of the current server and a backup of the Organization Key to restore from. Then follow the process below to migrate the server.
1. With the iso file mounted (or burned CD in the drive) of the new server, turn the server on. You will see this screen:

2. Press Enter to get started.
3. On the following screen, select Continue:

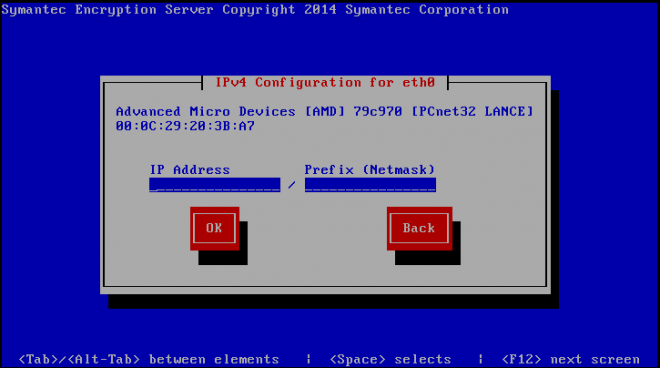
4. Enter the IP Address and Subnet Mask you will use for the new server during the configuration process. Select OK. THIS SETTING WILL BE OVERWRITTEN DURING RESTORE PROCESS.
EXAMPLE:

5. Enter the Gateway, Primary DNS, and Secondary DNS for the server. Select OK.

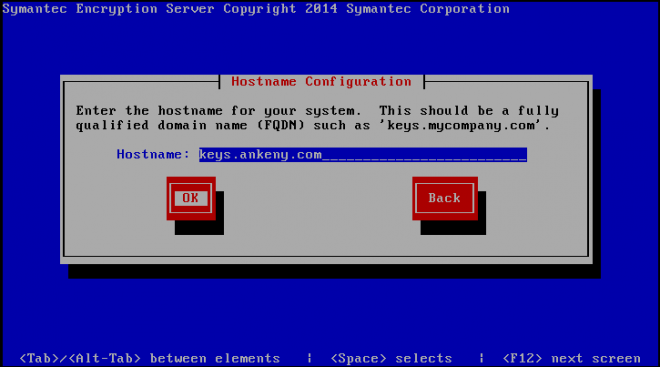
6. Enter the temporary Hostname for the computer. THIS SETTING WILL BE OVERWRITTEN DURING RESTORE PROCESS.
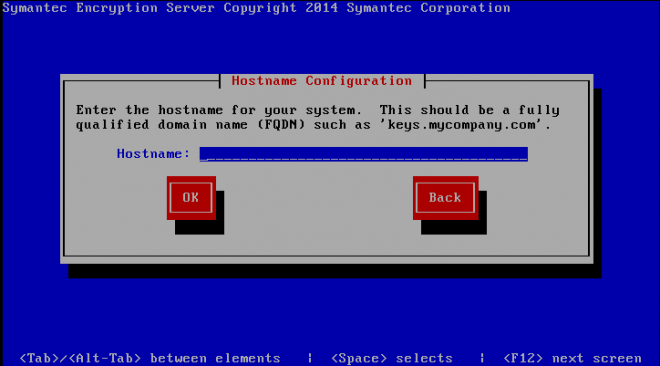
EXAMPLE:
7. Wait for the server to finish installation. When it finishes, the console will look like this:

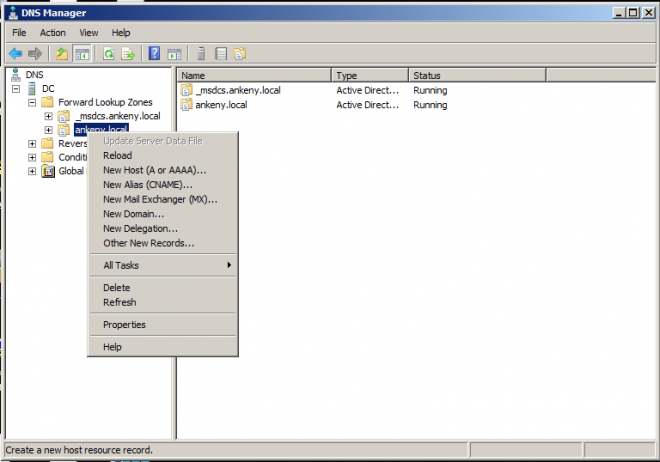
8. OPTIONAL - If you do not wish to create a DNS entry for the server (remember the IP Address and hostname will be overwritten during the restore operation), you can use the IP address instead of the FQDN for initial setup. Below are some screenshots of my test lab as I made the DNS entry:


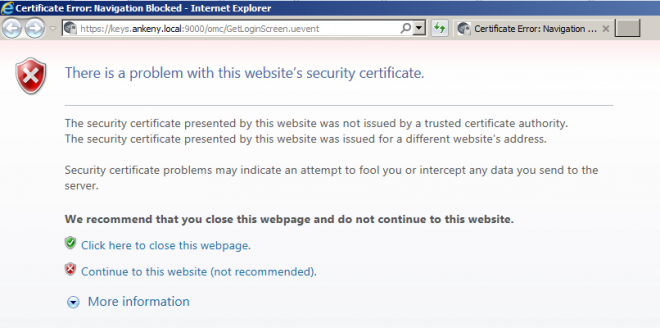
9. Navigate to the server in a web browser, either by the FQDN (if you set it in DNS) or by IP Address (e.g. https://192.168.29.18:9000). You should see a certificate warning, like the following screenshot. These vary in appearance in the different browsers. Continue to the site.
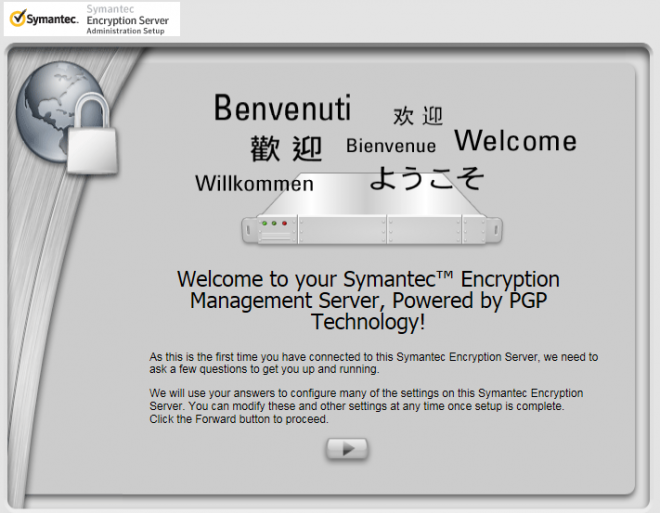
10. You should now see the initial setup screen in the web interface. Press the Arrow button to continue.
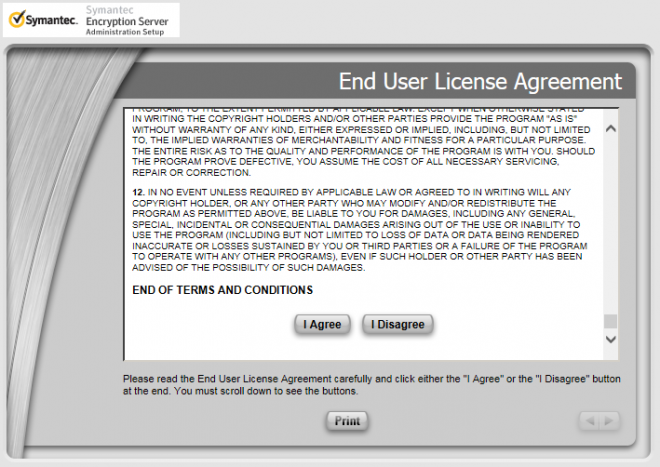
11. Read the license agreement and select I Agree.
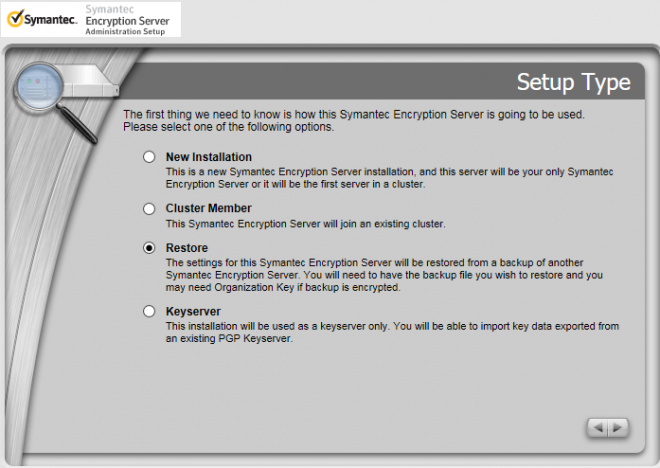
12. Select the Restore option as shown below:
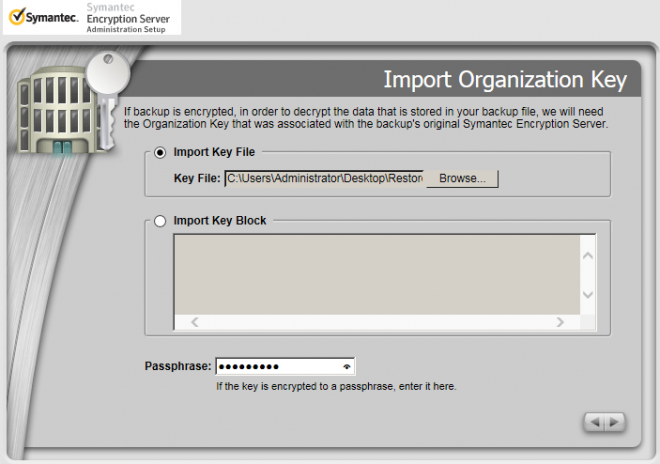
13. Browse for your saved Organization Key, and Open it.

14. Enter the passphrase given to the Organization Key when it was exported. Click the arrow in the bottom right to continue.
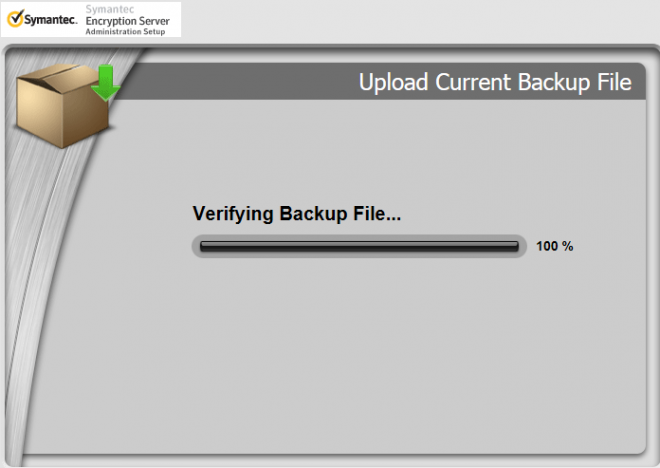
15. Browse to the backup file for the server, and Open it.

16. The backup will upload and verify
17. The server will now apply the settings from the original server. It will need to reboot to implement changes.
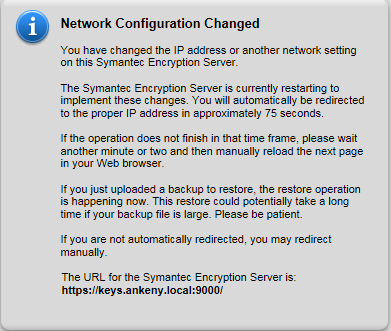
18. When the screen below is shown, you may wish to refresh the page every minute or two to check on the status.
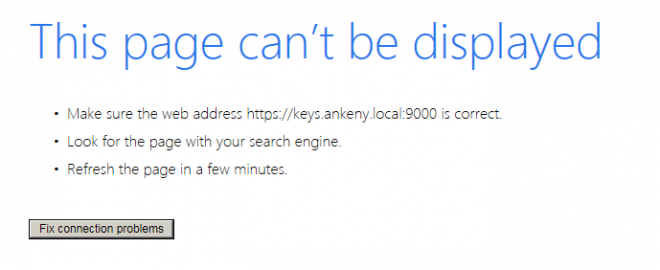
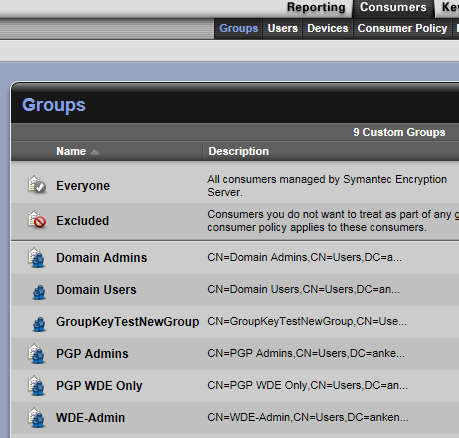
19. When the server reboots, log in to the server, and verify the groups/users are present.
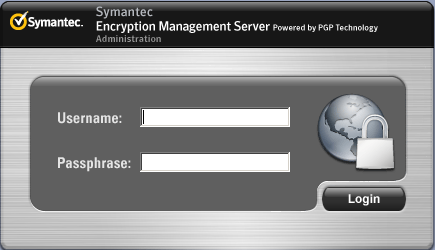
EXAMPLE: