Quick Start Guide – PXE Configuration
This document will help to explain the configuration process of the PXE server.
As always, please review the Ghost Solution Suite Install and Upgrade guide located athttp://support.symantec.com/en_US/article.DOC8617.html before modifying any services related to Ghost Solution Suite.
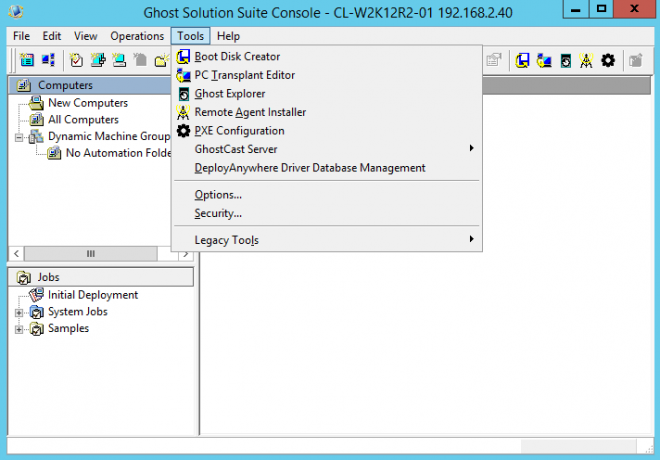
1. Open Ghost Solution Suite and then open the PXE server configuration (Represented as a Gear icon in Ghost Solution Suite) as shown in the image below.
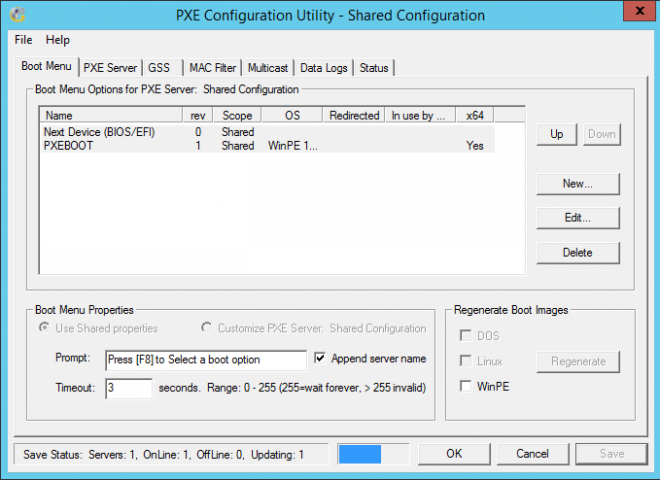
2. Select “New” on the right hand side of the PXE Configuration Utility window
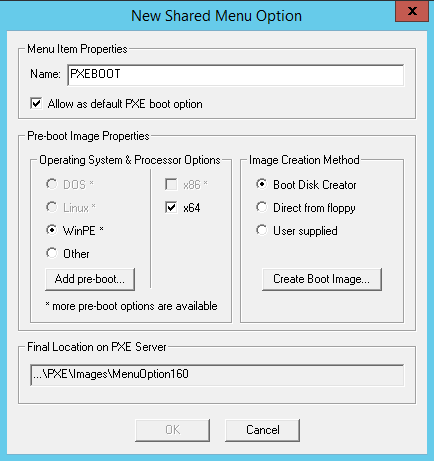
3. The first step in configuring PXE is to import a pre-boot environment. Select “Add pre-boot” on the left hand side of the New Shared Menu Option screen.
*Note – Windows ADK and WinPE should be installed prior to this tutorial
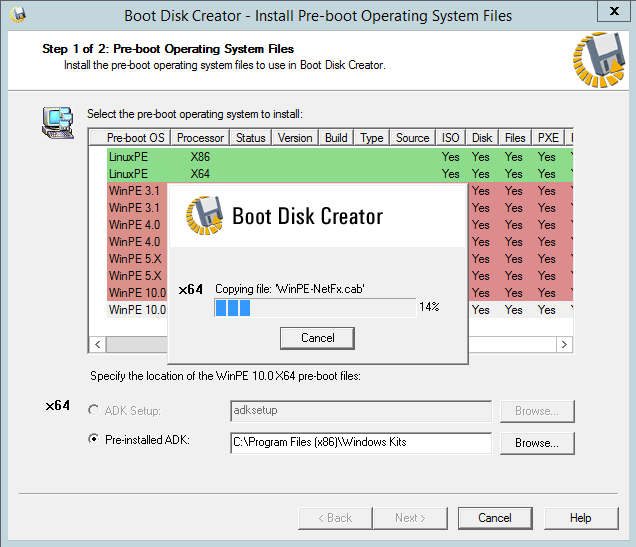
4. Select the WinPE environment that matches the Windows ADK installed earlier. For instance if Windows ADK 8.1, this would be the WinPE 5.X environment.
Select the Pre-Installed ADK radio button and navigate to the Windows ADK install folder (Typically: C:\Program Files (x86)\Windows Kits). Select next and wait for the WinPE environment to be imported into the PXE configuration.
5. Now that a pre-boot environment has been imported, it is time to create a PXE boot environment.
- First, give the PXE configuration a good name.
- Make sure WinPE * is selected on the left hand column.
- Select either x86, x64 or both depending on which WinPE environments were loaded in the previous step.
- Select Boot Disk Creator on the right hand column and click the “Create Boot Image” button.
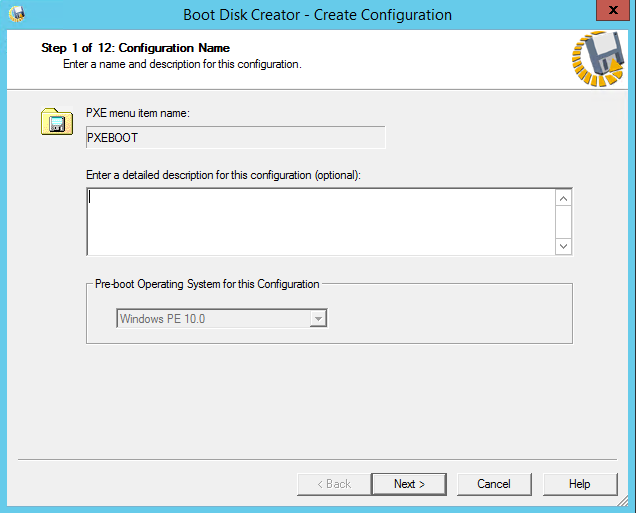
6. The Configuration Name step allows for a detailed description to be specified for the PXE configuration, if inclined please specify one now. Select next to proceed.
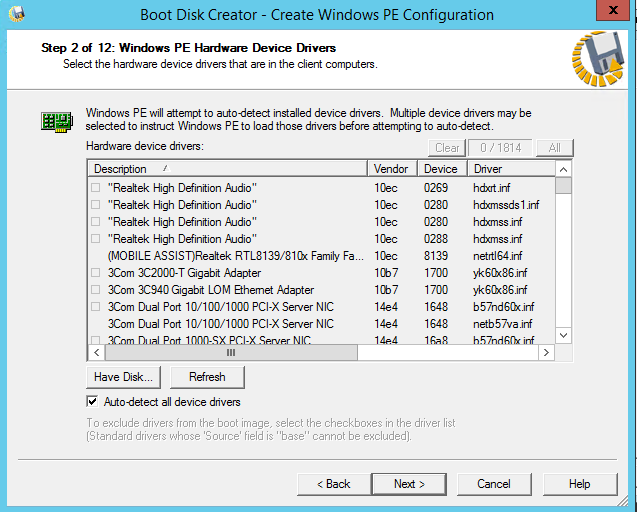
7. The Windows PE Hardware Device Driver screen is where drivers are specified for this particular boot configuration. For the sake of this tutorial we are going to add a driver into our PXE config by selecting the “Have Disk…” button below.
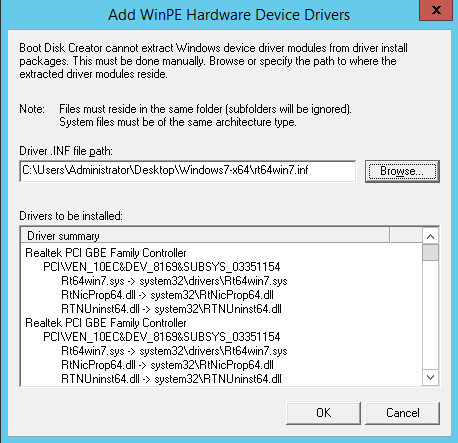
8. Browse to the Driver location and wait for the “Drivers to be installed” window to populate. Select ok once properly populated.
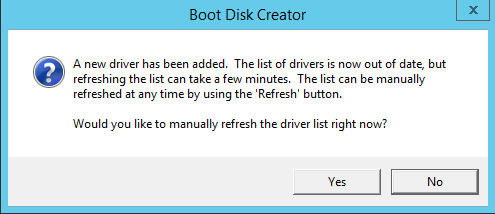
9. Loading new drivers may take a moment, when this process is completed the Boot Disk Creator will ask to refresh the driver list. Select yes when this occurs. After the driver list refreshes, select next and continue on to the next step of the process.
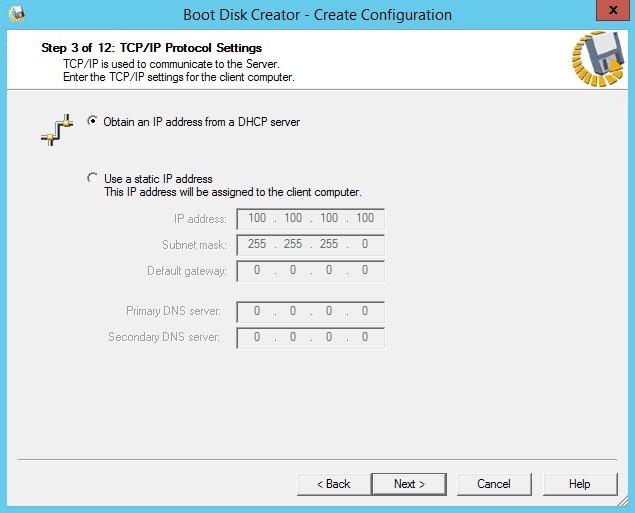
10. By default the PXE configuration will assume a DHCP client connection. A static I.P connection can also be set on this page.
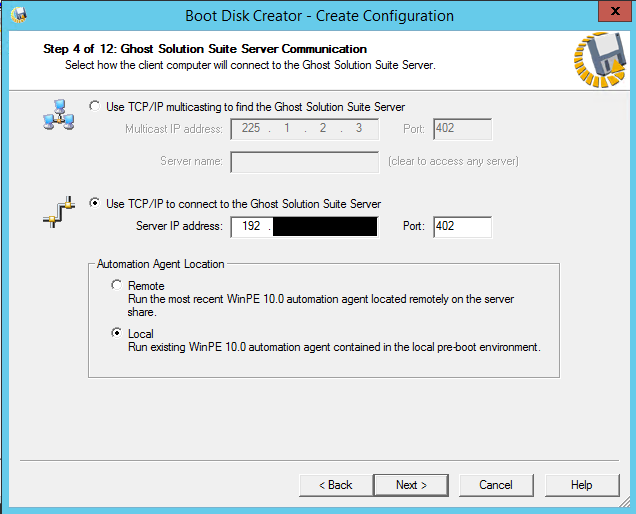
11. On this next screen, verify that the Ghost Solution Suite Server communication is set similar to the below screenshot. Take care to verify that the Server IP address matches the Ghost Solution Suite server IP. Automation Agent Location is based on preference, select one of the options and proceed with the configuration.
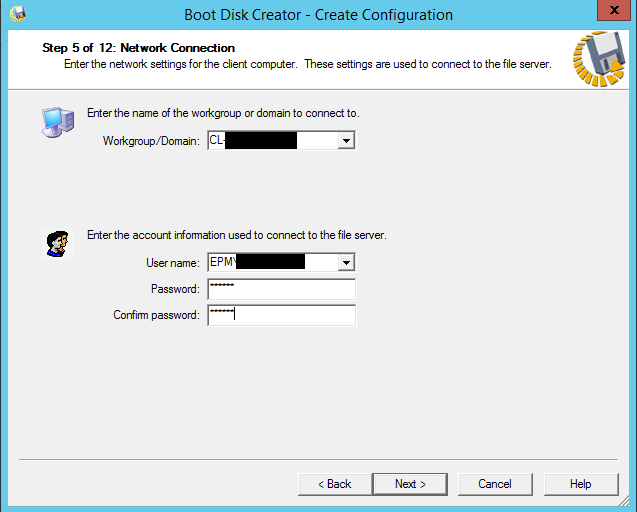
12. Verify the Network Connection settings before proceeding. Please enter either domain administrator or local administrator credentials on this screen.
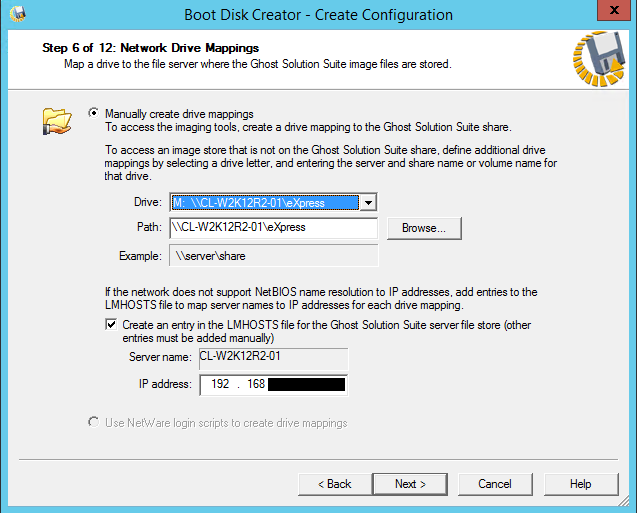
13. Ghost Solution Suite needs to be mapped for it to function properly. The Network Drive Mapping screen should show the computer name and Ghost Solution Suite share similar to the boxes below.
*Note – The Express share path will be different for every instance of Ghost Solution Suite, yours may or may not resemble the below information.
Verify that the LMHOSTS IP address matches the Ghost Solution Suite server IP.
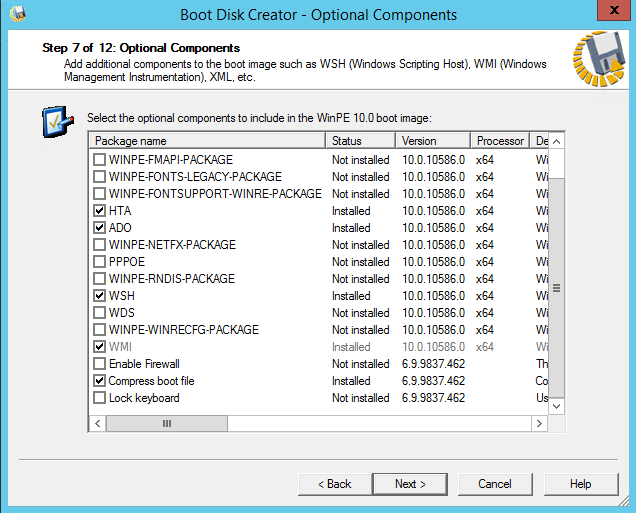
14. The next screen shows Optional Components. Default settings are usually applied but there are additional options that can be configured. Select next when satisfied with the selected options.
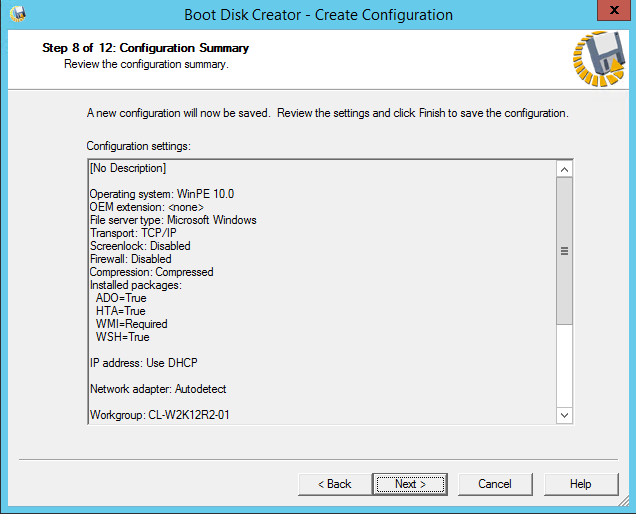
15. This Configuration Summary screen shows a summary of the PXE configuration, review and click next once the settings have been verified.
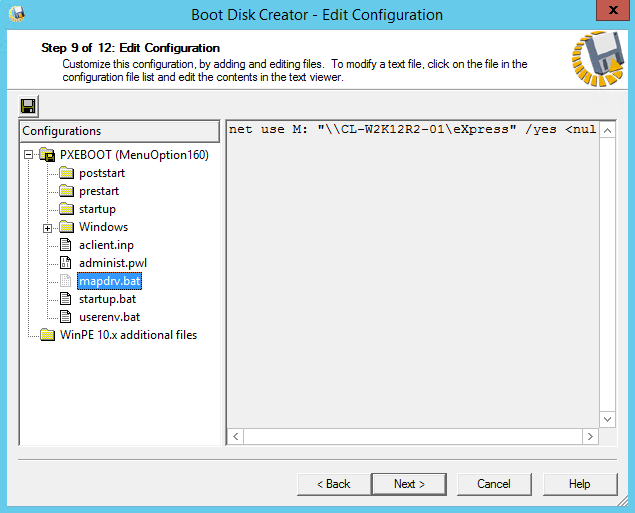
16. On the Edit Configuration menu, verify the mapdrv.bat file is correctly mapping the Ghost Solution Suite network share and proceed with the configuration.
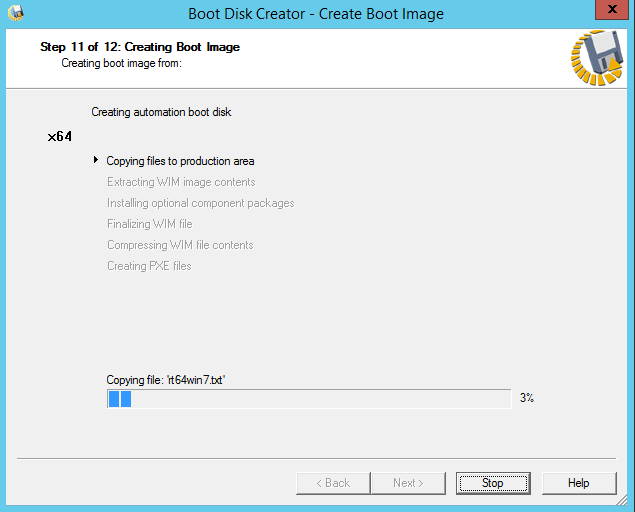
17. Select next on the Boot Disk Media Type screen and start compiling the PXE boot image. This can take anywhere from 15-45 minutes depending on the hardware specifications of the Ghost Solution Suite server.
18. After the PXE configuration has completed, select ok and then save in the bottom right hand corner of the PXE Configuration Utility Window. You should now also see the PXE server name listed in the Boot Menu Options shown below.
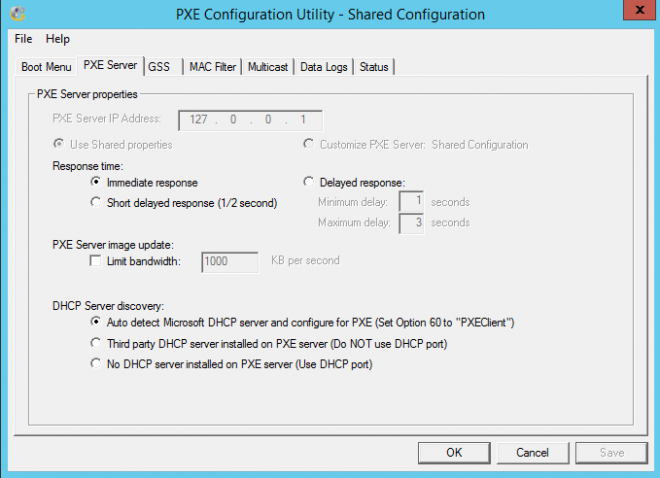
19. Navigate to the PXE Server tab and verify the settings for the DHCP discovery, by default Auto detect is selected and normally sufficient.
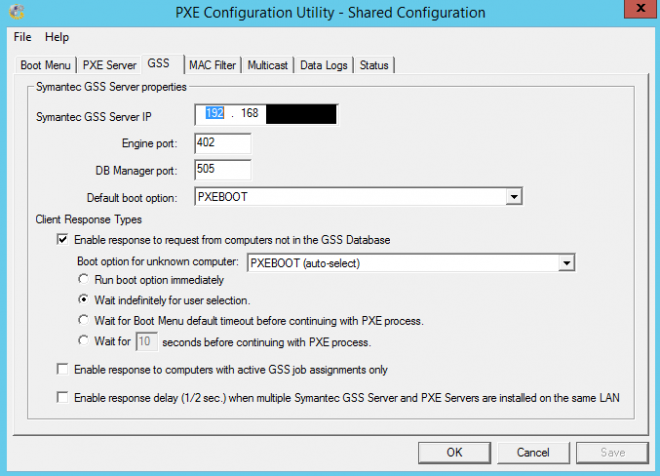
20. Navigate to the GSS tab and verify the IP address is correctly listed for the Ghost Solution Suite server. Also verify that the Default Boot Option is set to the configuration that was just created.
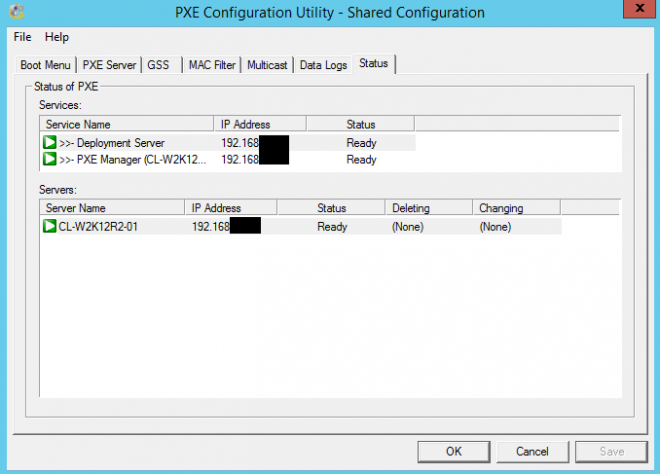
21. Navigate to the Status tab and select save in the bottom right hand corner. The PXE server will now update and show “Ready” if it has been configured properly.
Now that the PXE server has been successfully configured, connecting clients and image is but a few steps away.
If further help is required with Ghost Solution Suite or PXE configuration, please review the install and upgrade guide.