Introduction
This article will be about configuring SSL encrypted communication between CCS Application server and Production/Reporting server and also enabling SSL on CCS Web portal. Symantec CCS Planning and Deployment guide recommends to configure SSL communication between Application server and standalone database servers where the Production/Reporting DBs are hosted.
Database SSL configuration
SSL certificates
Right, you need one in order to use it to secure CCS. If you already have it, skip to next section, here I’ll show how to generate self-signed certificate purely for demonstration purpose, it should be noted that this should NOT be used in production instances at any time.
Install OpenSSL Win32
In order to produce self-signed certificate, we need software that is capable of producing such thing. Suitable is OpenSSL Win32. Download OpenSSL Win32 library (full install, no light) from following link (install latest version): http://slproweb.com/products/Win32OpenSSL.html
OpenSSL can be installed on any server, does not need to be installed on server where certificate will be placed, this software is just needed to generate CSR.
Generate self-signed certificate
To generate self-signed certificate, navigate to C:\OpenSSL-Win32> and run command similar to this:
C:\OpenSSL-Win32>openssl.exe req -new -newkey rsa:2048 -keyout hostkey.pem -nodes -out hostcsr.pem
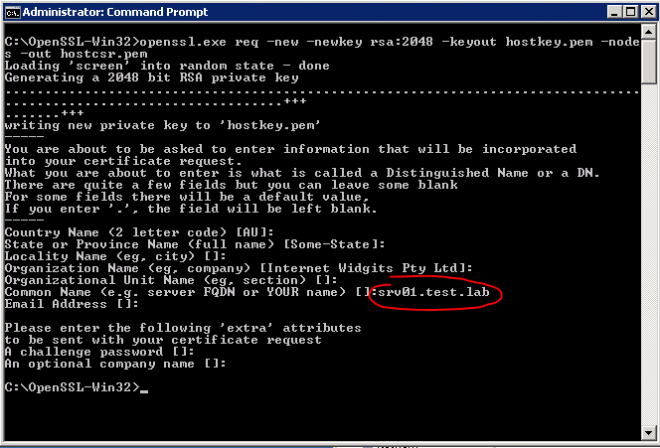
Note that the most important info is the Common Name (e.g. server FQDN), ensure that matches your SQL server FQDN other way it will not be accepted later in SQL config.
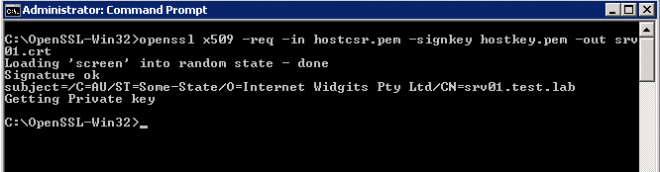
Now we proceed by signing the csr with key we just generated, creating self-signed certificate:
C:\OpenSSL-Win32>openssl x509 -req -in hostcsr.pem -signkey hostkey.pem -out srv01.crt
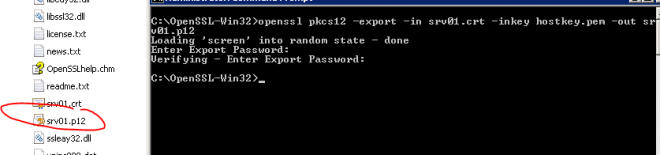
The last step is to export certificate and the private key into PKCS12 keystore that will be imported into MSSQL:
Importing certificate
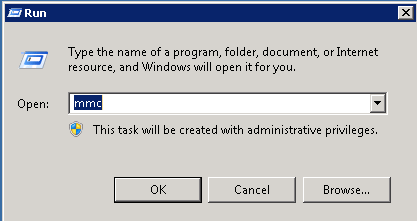
After we have obtained SSL (self-signed) certificate, next step is to import it into SQL server certificate store.
To import certificate follow these steps:
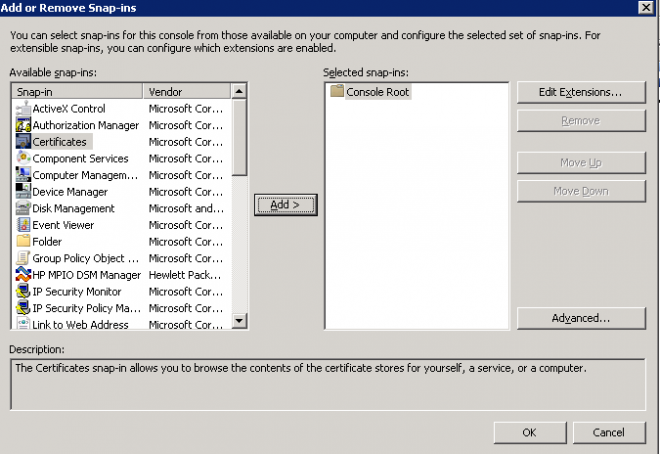
- Start->Run-> type mmc
- Click on File->Add/Remove snapin, locate Certificates and click on Add >
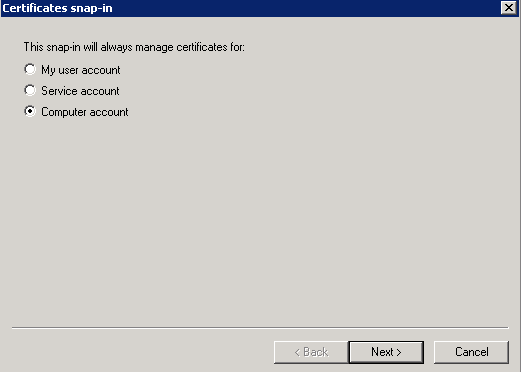
- Select Computer account
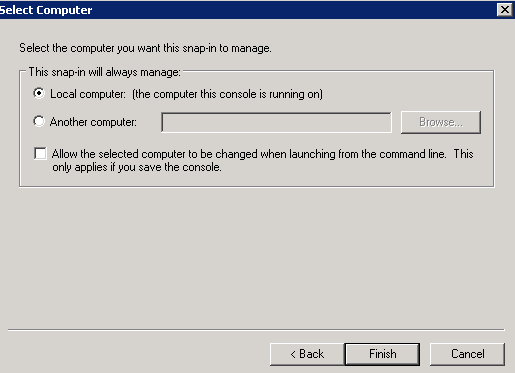
- And then Local Computer, and click Finish, and then OK
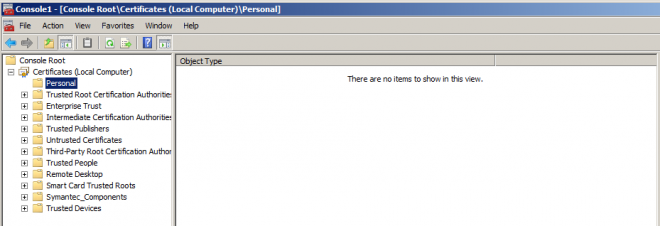
- If there is already existing certificate, it will be under Personal->Certificates location, other way the Personal folder will be empty.
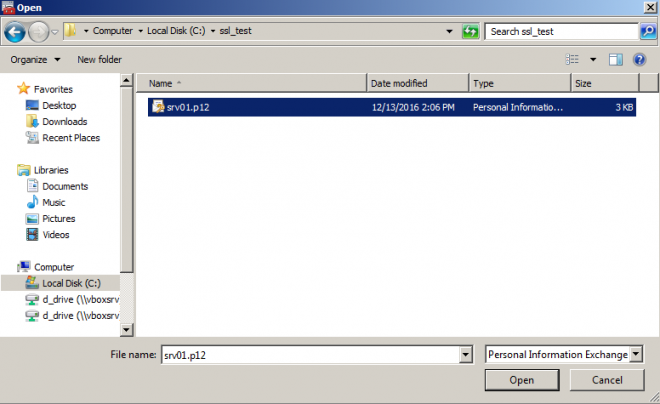
- To load new certificate, right-click on Personal, navigate to All Tasks and click Import…

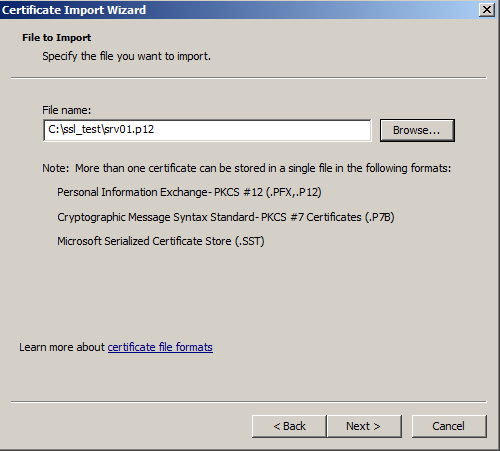
- In the Welcome to Certificate Import Wizard, click Next, then Browse to the .p12 certificate file. If you do not see the file, ensure you selected .p12 file extension in browse dialog:
- Click Next once you select the certificate
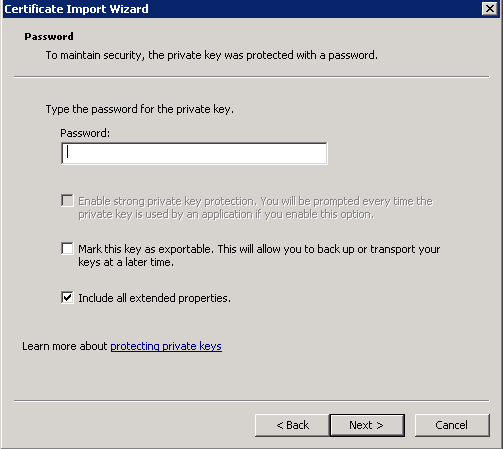
- If there was password configured during certificate creation, enter it in this window, if no password was configured, leave the field empty. Do not select “Mark this key as exportable…”. Click Next.
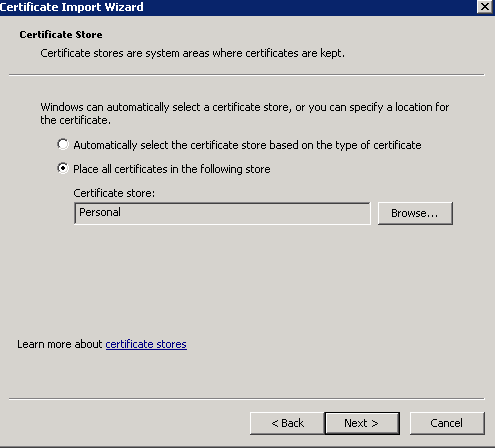
- Leave default certificate location and click Next.
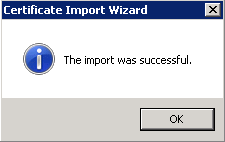
- Click finish at the Completing the certificate import wizard. If all was OK, you should see:
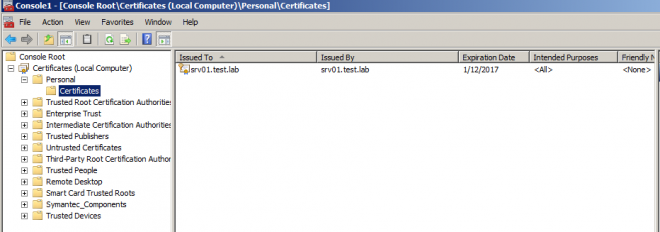
- New certificate will be visible in the console alongside old ones (if any). Next step is to configure SQL to use the (new) certificate.
Configuring SQL to use SSL certificate
To configure SQL to use SSL certificate, follow these steps:
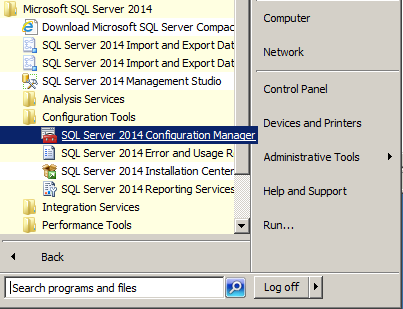
- Start SQL Server Configuration Manager from All Programs->Microsoft SQL Server 2014->Configuration Tools
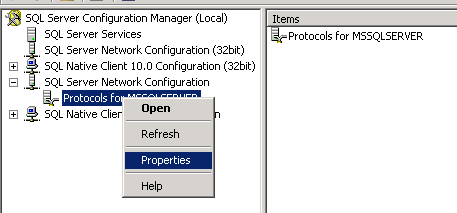
- Under SQL Server Network Configuration, right click on Protocols for MSSQLSERVER and select Properties:
- On the Certificates tab, select the appropriate certificate.
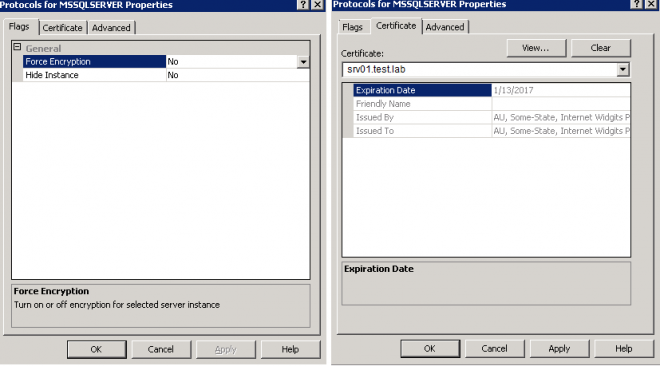
NOTE: in case you configure “Force Encryption”, connection between CCS Application Server and CCS Database will be secured regardless whether you enable “Use SSL” in CCS Console or not. This setting forces any client to use encrypted connection and if the client is not capable then it will fail. If you host other DBs on this SQL server and you have some legacy clients connecting that do not support encrypted connection, then leave this setting as “No” and select “Use SSL” in CCS Console. If your DB server is hosting CCS DB only, you can leave this setting as “Yes” and you’re done.
- Click OK. Warning will be shown
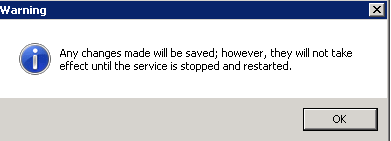
- Restart the SQL Server service
Configure CCS to use SSL certificate
After we configured SQL to use the SSL certificate, last step is to enable "Use SSL" in CCS Console configuration.
- Open CCS Console
- Under Setting -> Secure Configuration, select Production/Reporting Database Connection
- Check the “Use SSL” check box
- Click on Update
- Perform steps 1-4 for Reporting Database Connection.

NOTE: if you receive message “Failed to update the connection string” ensure that your “client” has the SSL certificate root certificate in the Trusted root certificate store. This is less likely to happen in production since the certificate will be signed by Trusted CA, but in our self-signed certificate example, I had to add srv01 certificate to trusted root store on both the CCS Application server and CCS Database servers.
Webserver (IIS) SSL Configuration
As for the securing communication between CCS Application server and Database servers using SSL certificate explained in previous section, in this one we’ll discuss securing the CCS Web console with SSL certificate.
As in previous section, I’ll show usage of self-signed certificate for the demonstration purpose which should not be used for servers in production.
Install self-signed certificate for testing purpose
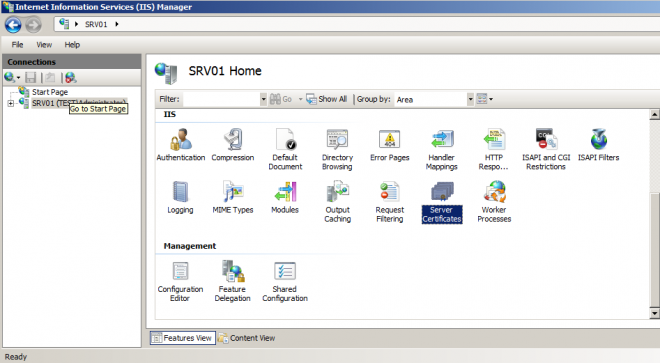
- Open Internet Information Service (IIS) Manager
- Navigate to Server Certificates under Web server name node
- On the Actions menu on right side, click on “Create Self-singed certificate” link
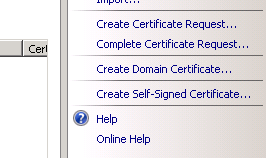
- Specify a friendly name, e.g. “CSS Web (test)” and click OK
- Certificate will appear under the Server Certificates

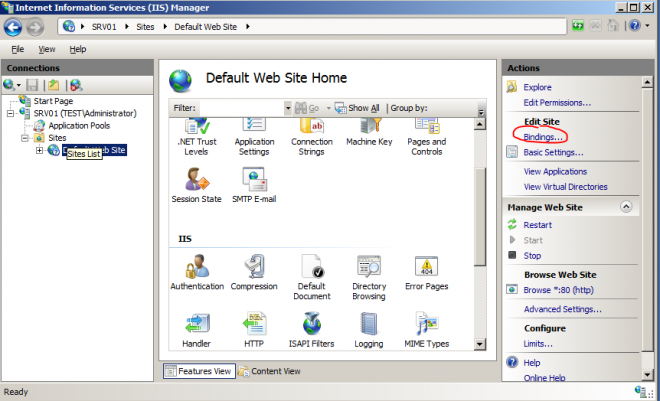
- Navigate to Default Web Site and on the right menu click the Bindings... link
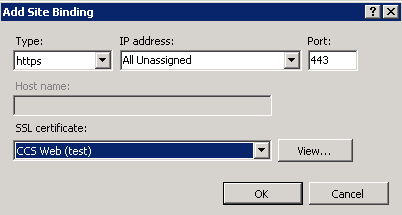
- If there is no “https” type, click Add and select following:
- Type: https
- IP Address: leave default “All Unassigned”
- Port: leave default “443”
- SSL Certificate: select the appropriate certificate
- Click OK
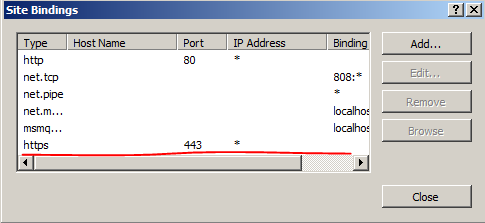
- Click Close on Site Bindings window
- Test the connection via browser – if you used self-signed certificate you’ll receive warning that there is issue with certificate and that connection is not secure which is normal since the self-signed certificate is not trusted by web browsers.
I hope this article was useful and you have solved your issue or learned a thing or two. If you find something that should be updated/corrected/added/removed from this article, feel free to contact me.
Best Regards,
Vladx