Part 3 of this series deals with creating and configuring your first Ghost job. But why, in the first place, would you want to use Ghost? There would be a number of scenarios for this, and I will outline some of them below:
- Migrations – if you’re not in a VDI environment, migrations of PCs and laptops to new operating systems are a part of everyday lfe. These migrations can be very time consuming, especially if you’re forced to copy data off onto another storage location, upgrade, and then copy data back, and potentially reinstall applications.
- Deployment of New Hardware – A couple of PCs are easy to do one-by-one, but what if there is a mass deploy of new machines? Another time-consuming activity unless you have an entire team of engineers doing this at the same time. GSS simplifies this by allowing you to roll out an image to multiple machines at the same time, with the same consistent result;
- Simple image management – You can, in effect, create fewer images and have greater management and control over those images when deploying them to PCs and workstations;
- Upgrade of software – Besides upgrading operating systems, it’s also possible to upgrade the software on these PCs once they have become managed systems.
There are enough resources available on the Symantec site dealing with best practices, readme files, admin guides etc, and I would suggest checking those out.
For the purpose of this article, I am create a standard image from which I can deploy to multiple PCs if I wanted. My lab is fired up, and ready for the configuration wizardry to happen. I have kept this basic, so if you’re a newcomer, or busy evaluating the software as I am, it’s going to be easy-enough to follow.
Open up Symantec GSS and you’re presented with a screen as per the below. In my case, I have no PCs or images as I have just installed the application.

Click: File - New - Job Wizard to get going, which brings up a splash screen offering you a number of options. You can:
- Create an image – used if you want to image an existing PC for use as a deployment base for additional PCs;
- Deploy and configure computers – used when deploying to multiple PCs;
- Deploy software packages – either install new, or update existing software, on PCs;
- Restore a computer – used if a PC crashes catastrophically. This restore is done from the previous image created;
- Migrate computers – migrate between PCs or OS’s.
Since this is to create a new image, I am selecting the first option (Create an image). Give the job a name if you require, which can be useful when tracking what was done and when.
On the next screen, select the PC that you would like to create an image from, then click Next.
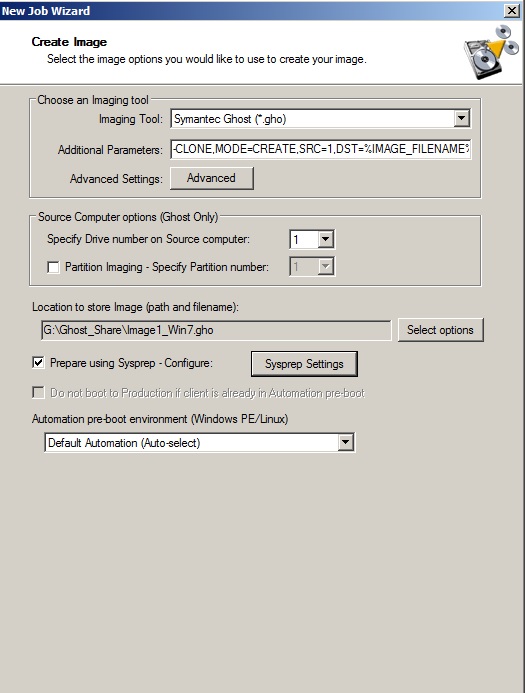
The next screen has a lot of information that can be customized. You choose the Imaging Tool to use (my was left with Symantec Ghost (*.gho)), and you can add/remove parameters, or make use of the Advanced option to set compression speeds. The only change I made here was to the storage location and to invoke SYSPREP (which for those of you in the know basically reverts the machine back to pre-finalisation of the installation and gives it a new SID and randomly generated name to prevent clashes on the network).
Click Next, and a Summary screen is shown. Review this if you want and you have your final 2 options:
- Clicking Next brings up the Schedule Job;
- Clicking Finish runs the job immediately.
This completes the configuration of your first Ghost job, and when it runs, you will the creation of your Ghost file in your location chosen.
Another way of doing this is to Ghost the PC locally instead of from the Ghost Console. For me this is ideal if you have a PC you need to create an image of a single PC, but this isn’t efficient when you have multiple PCs. For this, rather use the GSS Console.
You would browse to the GSS server, and see a default share called eXpress. Navigate to the Ghost folder and run the version of Ghostxx.exe you need for your OS.
It brings up this screen:
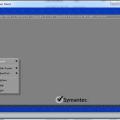
This screen should be very familiar to most people who have used Ghost in the past, and is easy to navigate and use. For the purpose of this article, I will do create an image of my VM using the Local à Disk à To Image. Choose your Source drive, choose your Destination drive and give it a file name.
Pressing OK brings up a query: Compress image file? Choose your option (No, Fast, High) and run the image creation.
Let it run, and it will create the *.gho file that you can use for your own purposes.
I hope that this has helped introduct you to creating a Ghost image.