Brian Tokuyoshi - Senior Product Marketing Manager
Putting together a good data protection strategy shouldn’t depend on whether or not your security vendor chooses to support it. However, based on the adoption of the Apple Macintosh in the enterprise, a lot of IT organizations are getting caught off guard. They’re finding that the vendor they chose to protect their Windows data doesn’t offer any solutions to address Mac OS X users, thus creating a gap in their data protection strategy for an important and growing segment of their user population.
The rise in the use of Mac OS X in business is attributable to a number of factors, including grass roots adoption by individual users, growing consumerization corporate IT, and the acquisition of new companies that have an existing Mac installed base. It’s not practical to just leave these laptops unprotected, and it’s an equally bad idea to use a separate product with a different set of administration tools.
PGP Corporation’s product line includes support for both Windows and Mac OS X platforms, and organizations can mix & match while using the same administrative tools. One of the popular configurations that many users ask us about is how to set up PGP Desktop Email with one of their existing email accounts. In particular, Google Gmail is one of the most popular messaging platforms, and it does support access from a mail client via the POP and IMAP protocols. In this blog entry, I provide step-by-step instructions on how to get PGP Desktop Email working with Gmail. These instructions explain the process using a Mac Book Pro with Mac OS X version 10.5.8, Apple Mail 3.6, and PGP Desktop 10.0.2
Note that deploying PGP Desktop Email together with PGP Universal Server will dramatically reduce the number of steps listed below. This configuration guide is to help users with standalone configurations. This process should take about 10 minutes to do.
Step 1: Setting up POP Access in Gmail
The first step is simple – the ability to access email via POP is not turned on in Gmail by default. Log into your Gmail account, click the Forwarding and POP/IMAP button, and choose one of the options to enable POP in the POP Download: options.

Step 2: Setting up PGP Desktop Email on your Macintosh
This step simply involves installing the PGP Desktop client. I’ll assume that you didn’t have any problems getting the installer going and I’ll jump ahead to explain how the wizard sets up a PGP key. (In order to clarify the terminology, a PGP key is a structure that can contain other keys. So a PGP key actually contains a public key, a private key, and possibly additional symmetric and asymmetric keys as well depending on how the PGP key has been set up).
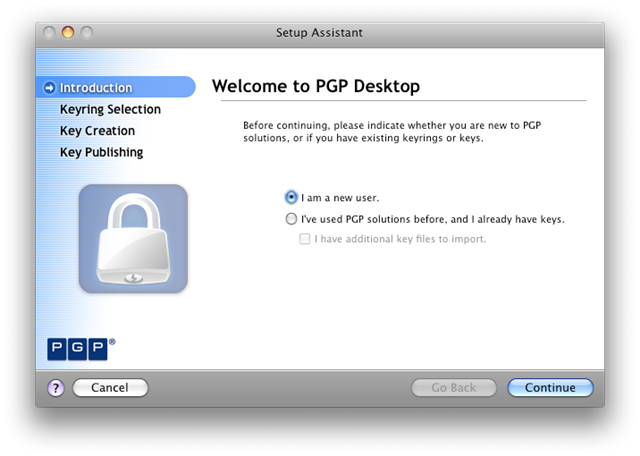
The first screen simply asks the user whether or not they have an existing PGP key. It’s to determine whether the wizard should take the user through the process of creating a new PGP key, or to import an existing one. Let’s create a new key for this tutorial by selecting “I am a new user.”
The next step explains where the keyrings live on your local file system. When you’re done creating your PGP key, it’s important to backup your keyring in order to avoid the problem of a lost or damaged key. This is especially important if you are not using PGP Universal Server to provide the administrative services for key recovery.

The wizard then displays some tutorial information about what’s going on when creating a new PGP key.

When creating a PGP key, the key must be linked to some identity that declares the owner. I’m making this key for a Gmail account and I enter that user’s name and email address in the dialog.

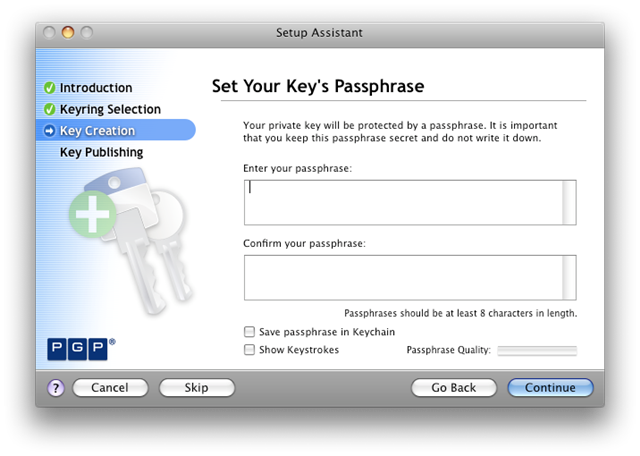
In order to protect the private key, a user must enter a passphrase to unlock it. This step prevents unauthorized usage of the private key in the event that an unauthorized party obtains it.
PGP Desktop Email presents a summary of the characteristics of the PGP Key being created.

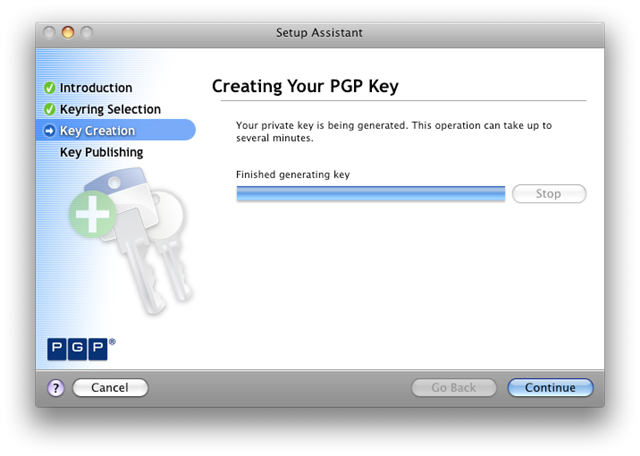
The wizard provides details about the key generation process and lets the user know that it’s complete.
The PGP Global Directory is a hosted service that allows users to look up the public key of another user. The wizard walks users through the steps to get your newly created public key published so that others may send you encrypted email through this service. Note that using the PGP Global Directory is optional, and there are other methods to exchange a public key with another party without using this service.

That concludes the PGP Key creation wizard. If you want to see your key in the PGP Global Directory, open a web browser and visit http://keyserver.pgp.com
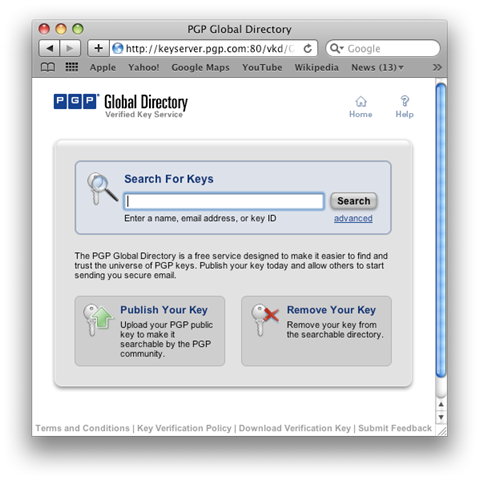
When searching for a key, be mindful of the search options to make sure you’re searching through the correct field, and that you understand how the modifiers affect a search. In this screen, we’ve successfully located our user in the global directory. There’s an option to download the key, thus permitting encrypted communication with the user.

Step 3: Setting up Apple Mail 3.6
Both Apple Mail and PGP Desktop Email have wizards that help simplify the setup process. However, there are some peculiarities with Gmail that confuses both wizards, so it’s better to do setup manually. (For the gory details, Apple Mail attempts to enable SSL in the wizard and doesn’t provide an option to override the setting unless it’s manually configured. The wizard also gets confused because Gmail reroutes requests from gmail.com to the 1e100.net domain, which makes it look like it's setting up the wrong email account. On top of all of this, Gmail uses its smtp.gma)
First, let’s setup Apple Mail, and make sure that it’s working properly with Gmail. We’ll first disable PGP Desktop Email so that we don’t confuse the PGP wizard during the configuration process. Let’s first quit PGP Desktop Tray, which is a background service that handles communication with desktop applications.
To quit PGP Desktop Tray, you'll need to hold down the OPTION key while clicking the PGP lock icon in the upper right corner of the screen. This will enable the Quit option to appear. If you do not hold down the OPTION key, the Quit option will not show up. This feature prevents people from accidentally quitting the PGP Desktop Tray. PGP Desktop Tray should be running all the time under normal circumstances, but because we'll be doing manual configuration, go ahead and hold down the OPTION key to activate the Quit option.

Launch Apple Mail and it will start the wizard to create a new account.
 After clicking Continue, Gmail should be working properly with Apple Mail. Test it out by creating an email and testing send/receive.
Now let’s reconfigure the account so that it will work with PGP Desktop Email. We need to set up the account so that it can use PGP Desktop Email as a local mail proxy for Apple Mail. What this means is that PGP Desktop Email will make the actual connection to the Gmail servers, and takes care of the email encryption/decryption automatically as the mail stream passes.
In order to do this, we’ll need to prevent Apple Mail from making an SSL connection for both POP and SMTP.
In Apple Mail, under Mail->Preferences, get ready to edit your account information. The first thing that we’ll do is reconfigure the SMTP connection. Click the arrow buttons that appear in the Outgoing Mail Server next to Gmail SMTP and click Edit Server List.

Under the Advanced tab, there is a check box next to “Use Secure Sockets Layer (SSL)”. Make sure that’s disabled and click OK.

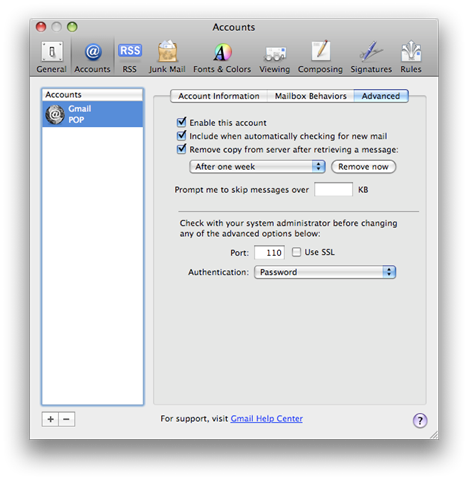
Next, go back to your account and click the Advanced tab in the upper right. This will bring up the “Use SSL” option for the POP account. Uncheck “Use SSL”, which will change the port automatically from 995 to 110. Click Save.
After you saved your configuration, quit Apple Mail so that the wizard doesn’t start up during the steps in the next section. We’re all done, and now we’re ready for the final step.
Step #4 – Setting up PGP Desktop Email
Make sure that Apple Mail is not running, because otherwise it will trigger the PGP Desktop Email wizard. We want to set this up manually instead.
Launch PGP Desktop Email and go to PGP Messaging. Click the button to Create New Service.

Now we’ll enter the information that helps PGP Desktop Email understand how to make the connection to Gmail. The configuration should be relatively straightforward. Note, you’ll want to make sure that you set the default key to the key that you just created during the setup process, so that PGP Desktop Email knows that this key belongs with this account.

After configuring PGP Desktop Email, you’re ready to start testing.
Step #5 – Testing it out
Launch Apple Email, and create a new message. A good way to test that the service is operating correctly is to send a message to yourself.
After creating a test message and sending the mail, PGP Notifier will show the state of the encryption process. Since we need to unlock the private key (again, in order to prevent authorized use of the private key in case of theft), there’s a prompt to enter the passphrase for the key. The message will be encrypted and signed and sent along its way.

After waiting a moment, check your email and you’ll see it arrive. Open the message and you can see that the message contains an annotation that indicates that the original message had a digital signature and was encrypted.

You should be up and running and enjoying secure email with your Macintosh. That wraps up the tutorial on using Apple Mail with Gmail and PGP Desktop Email. Feel free to drop a message in the comments section if you need any clarification on any of the steps listed above.